Federated Learning with TensorFlow/Keras and Flower (Advanced Example)
[!TIP] This example shows intermediate and advanced functionality of Flower. If you are new to Flower, it is recommended to start from the quickstart-tensorflow example or the quickstart TensorFlow tutorial.
This example shows how to extend your ClientApp and ServerApp capabilities compared to what’s shown in the quickstart-tensorflow example. In particular, it will show how the ClientApp’s state (and object of type RecordDict) can be used to enable stateful clients, facilitating the design of personalized federated learning strategies, among others. The ServerApp in this example makes use of a custom strategy derived from the built-in FedAvg. In addition, it will also showcase how to:
Save model checkpoints
Save the metrics available at the strategy (e.g. accuracies, losses)
Log training artefacts to Weights & Biases
Implement a simple decaying learning rate schedule across rounds
The structure of this directory is as follows:
advanced-tensorflow
├── tensorflow_example
│   ├── __init__.py
│   ├── client_app.py   # Defines your ClientApp
│   ├── server_app.py   # Defines your ServerApp
│   ├── strategy.py     # Defines a custom strategy
│   └── task.py         # Defines your model, training and data loading
├── pyproject.toml      # Project metadata like dependencies and configs
└── README.md
[!NOTE] By default this example will log metrics to Weights & Biases. For this, you need to ensure that your system has logged in. Often it’s as simple as executing
wandb loginon the terminal after installingwandb. Please, refer to this quickstart guide for more information.
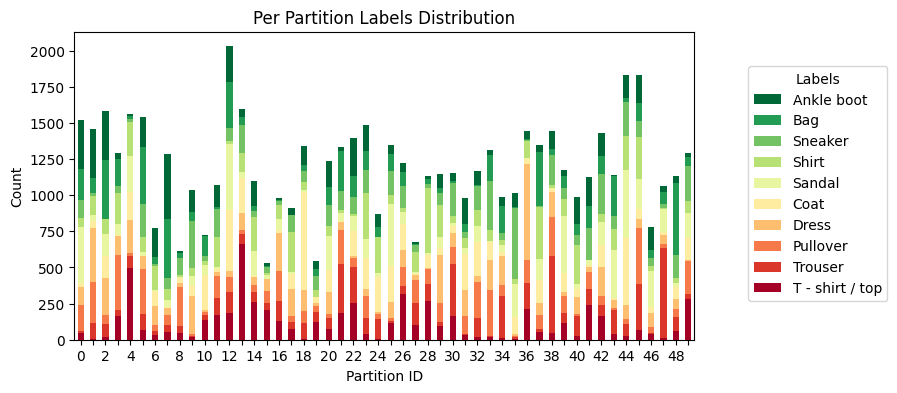
This examples uses Flower Datasets with the Dirichlet Partitioner to partition the Fashion-MNIST dataset in a non-IID fashion into 50 partitions.

[!TIP] You can use Flower Datasets built-in visualization tools to easily generate plots like the one above.
Install dependencies and project
Install the dependencies defined in pyproject.toml as well as the pytorch_example package. Note that if you want to make use of the GPU, you’ll need to install additional packages as described in the Install Tensorflow documentation.
pip install -e .
Run the project
You can run your Flower project in both simulation and deployment mode without making changes to the code. If you are starting with Flower, we recommend you using the simulation mode as it requires fewer components to be launched manually. By default, flwr run will make use of the Simulation Engine.
When you run the project, the strategy will create a directory structure in the form of outputs/date/time and store two JSON files: config.json containing the run-config that the ServerApp receives; and results.json containing the results (accuracies, losses) that are generated at the strategy.
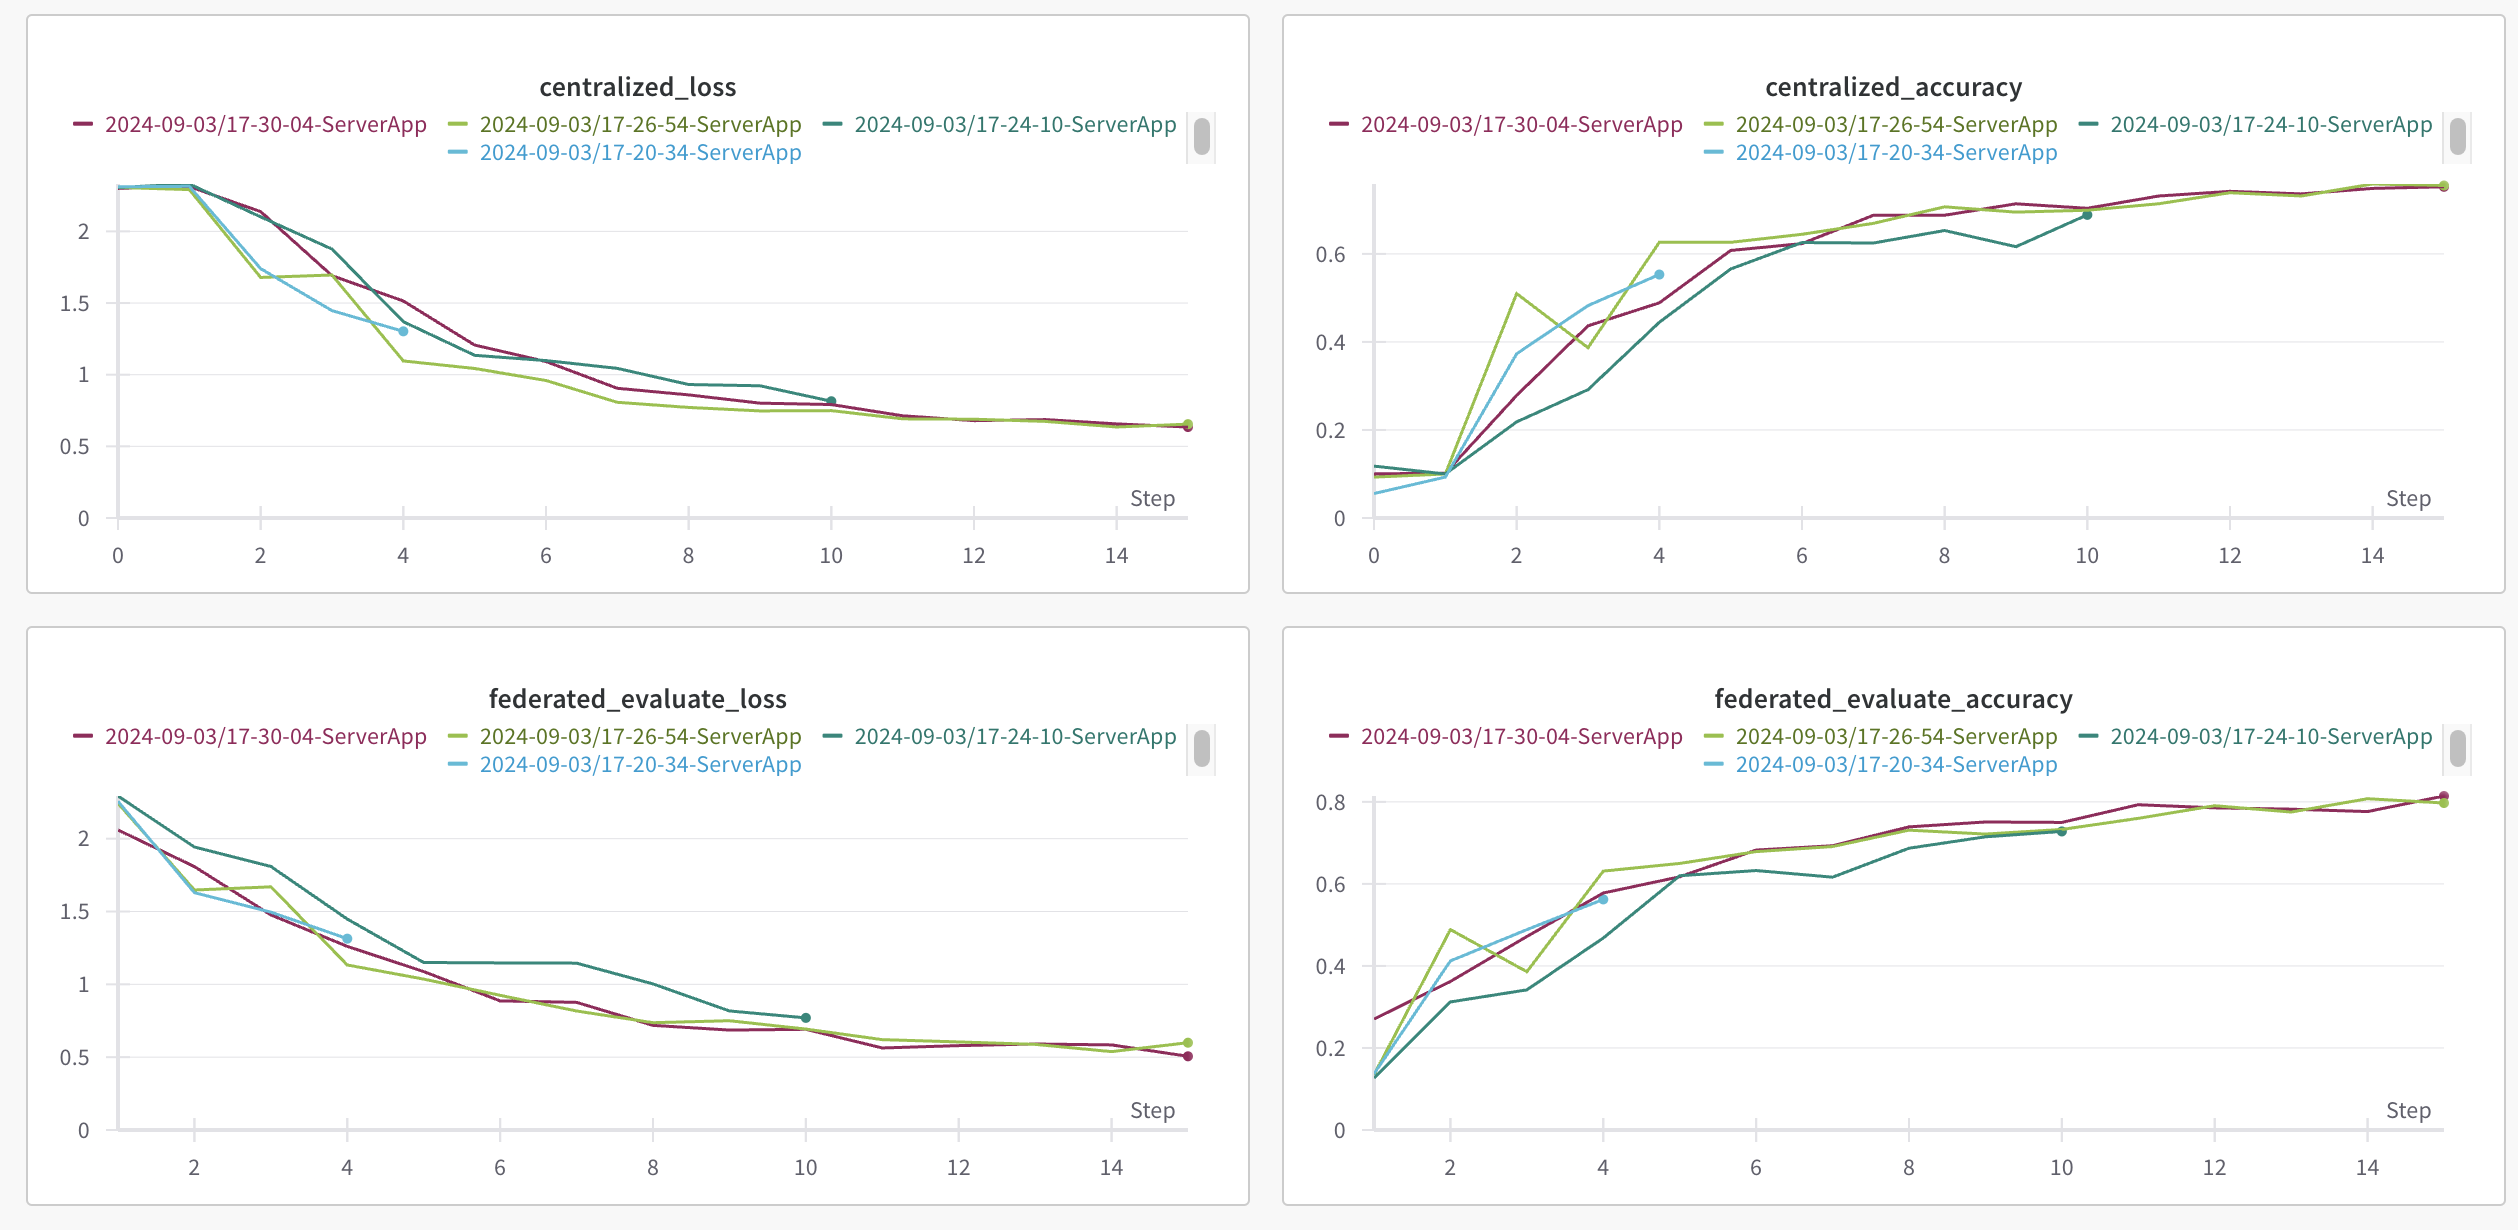
By default, the metrics: {centralized_accuracy, centralized_loss, federated_evaluate_accuracy, federated_evaluate_loss} will be logged to Weights & Biases (they are also stored to the results.json previously mentioned). Upon executing flwr run you’ll see a URL linking to your Weight&Biases dashboard where you can see the metrics.

The results.json would look along the lines of:
[
    {
        "round": 1,
        "train_metrics": {
            "train_loss": 2.42163295142398
        },
        "evaluate_metrics_clientapp": {
            "eval_loss": 2.303316633324679,
            "eval_acc": 0.11882631674867869
        },
        "evaluate_metrics_serverapp": {
            "accuracy": 0.1,
            "loss": 2.3280856304656203
        }
    },
    {
        "round": 2,
        "train_metrics": {
            "train_loss": 1.8474334717885639
        },
        "evaluate_metrics_clientapp": {
            "eval_loss": 2.1314486836388467,
            "eval_acc": 0.19826539462272333
        },
        "evaluate_metrics_serverapp": {
            "accuracy": 0.1,
            "loss": 2.2980988307501944
        }
    },
]
Run with the Simulation Engine
With default parameters, 25% of the total 50 nodes (see num-supernodes in pyproject.toml) will be sampled for train and 50% for an evaluate round. By default, ClientApp objects will run on CPU.
[!TIP] To run your
ClientAppson GPU or to adjust the degree or parallelism of your simulation, edit the[tool.flwr.federations.local-simulation]section in thepyproject.toml. Check the Simulation Engine documentation to learn more about Flower simulations and how to optimize them.
flwr run .
[!WARNING] By default TensorFlow processes that use GPU will try to pre-allocate the entire available VRAM. This is undesirable for simulations where we want the GPU to be shared among several
ClientAppinstances. Enable the GPU memory growth by setting theTF_FORCE_GPU_ALLOW_GROWTHenvironment variable to ensure processes only make use of the VRAM they need.
You can run the app using another federation (see pyproject.toml). For example, if you have a GPU available, select the local-sim-gpu federation:
export TF_FORCE_GPU_ALLOW_GROWTH="true"
flwr run . local-sim-gpu
You can also override some of the settings for your ClientApp and ServerApp defined in pyproject.toml. For example:
flwr run . --run-config "num-server-rounds=10 fraction-train=0.5"
Run with the Deployment Engine
Follow this how-to guide to run the same app in this example but with Flower’s Deployment Engine. After that, you might be intersted in setting up secure TLS-enabled communications and SuperNode authentication in your federation.
If you are already familiar with how the Deployment Engine works, you may want to learn how to run it using Docker. Check out the Flower with Docker documentation.
