在 GitHub 上投稿
本指南适用于想参与 Flower,但不习惯为 GitHub 项目贡献的人。
If you're familiar with how contributing on GitHub works, you can directly checkout our getting started guide for contributors.
建立资源库
- 创建 GitHub 账户并设置 Git
Git is a distributed version control tool. This allows for an entire codebase's history to be stored and every developer's machine. It is a software that will need to be installed on your local machine, you can follow this guide to set it up.
GitHub 本身是一个用于版本控制和协作的代码托管平台。它允许每个人在任何地方对远程仓库进行协作和工作。
如果还没有,您需要在 GitHub 上创建一个账户。
通用的 Git 和 GitHub 工作流程背后的理念可以归结为:从 GitHub 上的远程仓库下载代码,在本地进行修改并使用 Git 进行跟踪,然后将新的历史记录上传回 GitHub。
- 叉花仓库
A fork is a personal copy of a GitHub repository. To create one for Flower, you must navigate to https://github.com/adap/flower (while connected to your GitHub account) and click the
Forkbutton situated on the top right of the page.
您可以更改名称,但没有必要,因为这个版本的 Flower 将是您自己的,并位于您自己的账户中(即,在您自己的版本库列表中)。创建完成后,您会在左上角看到自己的 Flower 版本。

- 克隆你的分叉仓库
下一步是在你的机器上下载分叉版本库,以便对其进行修改。在分叉版本库页面上,首先点击右侧的 "代码 "按钮,这样就能复制版本库的 HTTPS 链接。
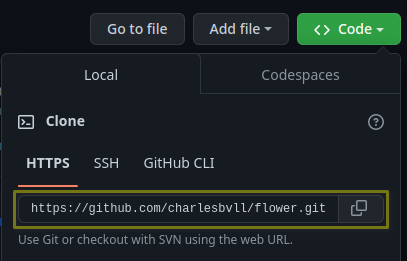
一旦复制了 (<URL>),你就可以在你的机器上打开一个终端,导航到你想下载软件源的地方,然后键入:
$ git clone <URL>
This will create a
flower/(or the name of your fork if you renamed it) folder in the current working directory.
- 添加原产地
然后,您就可以进入存储库文件夹:
$ cd flower
在这里,我们需要为我们的版本库添加一个 origin。origin 是远程 fork 仓库的 <URL/>。要获得它,我们可以像前面提到的那样,访问 GitHub 账户上的分叉仓库并复制链接。

一旦复制了 <URL> ,我们就可以在终端中键入以下命令:
$ git remote add origin <URL>
- 增加上游
Now we will add an upstream address to our repository. Still in the same directory, we must run the following command:
$ git remote add upstream https://github.com/adap/flower.git
下图直观地解释了我们在前面步骤中的操作:
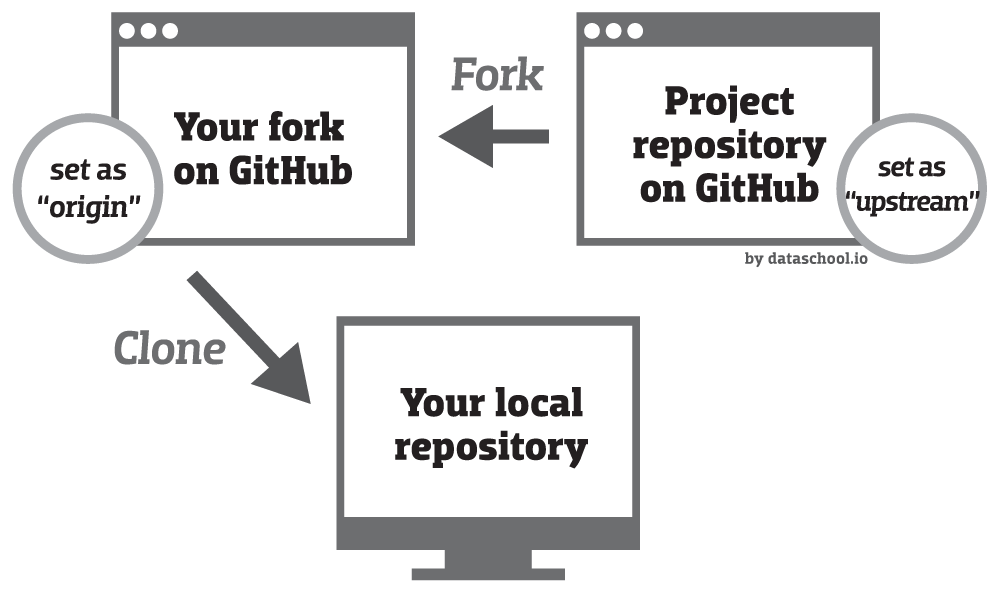
上游是父版本库(这里是 Flower)的 GitHub 远程地址,即我们最终要贡献的版本库,因此需要最新的历史记录。origin 只是我们创建的分叉仓库的 GitHub 远程地址,即我们自己账户中的副本(分叉)。
为了确保本地版本的分叉程序与 Flower 代码库的最新更改保持一致,我们可以执行以下命令:
$ git pull upstream main
设置编码环境
This can be achieved by following this getting started guide for contributors (note that you won't need to clone the repository). Once you are able to write code and test it, you can finally start making changes!
做出改变
在进行任何更改之前,请确保您的版本库是最新的:
$ git pull origin main
还有Flower的存储库:
$ git pull upstream main
- 创建一个新分支
为了使历史记录更简洁、更易于操作,为每个需要实现的功能/项目创建一个新分支是个不错的做法。
为此,只需在版本库目录下运行以下命令即可:
$ git switch -c <branch_name>
- 进行修改
使用您最喜欢的编辑器编写优秀的代码并创建精彩的更改!
- 测试并格式化您的代码
不要忘记测试和格式化您的代码!否则您的代码将无法并入 Flower 代码库。这样做是为了使代码库保持一致并易于理解。
为此,我们编写了一些脚本供您执行:
$ ./framework/dev/format.sh # to format your code
$ ./framework/dev/test.sh # to test that your code can be accepted
- 舞台变化
在创建更新历史记录的提交之前,必须向 Git 说明需要考虑哪些文件。
这可以通过:
$ git add <path_of_file_to_stage_for_commit>
To check which files have been modified compared to the last version (last commit) and to see which files are staged for commit, you can use the
git
status
command.
- 提交更改
Once you have added all the files you wanted to commit using
git add, you can finally create your commit using this command:$ git commit -m "<commit_message>"
The <commit_message> is there to explain to others what the commit does. It should be written in an imperative style and be concise. An example would be
git commit -m "Add images to README".
- 将更改推送到分叉
一旦提交了修改,我们就有效地更新了本地历史记录,但除非我们将修改推送到原点的远程地址,否则 GitHub 无法得知:
$ git push -u origin <branch_name>
完成此操作后,您将在 GitHub 上看到您的分叉仓库已根据您所做的更改进行了更新。
创建和合并拉取请求 (PR)
- 创建 PR
推送更改后,在仓库的 GitHub 网页上应该会看到以下信息:

Otherwise you can always find this option in the
Branchespage.Once you click the
Compare & pull requestbutton, you should see something similar to this: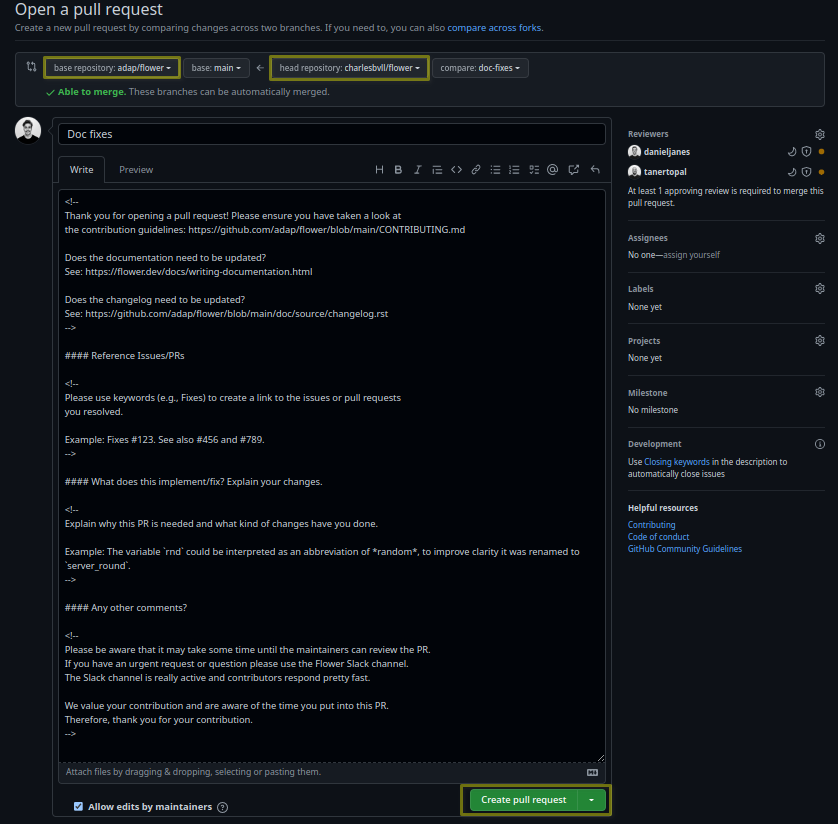
在顶部,你可以看到关于哪个分支将被合并的说明:

在这个例子中,你可以看到请求将我分叉的版本库中的分支
doc-fixes合并到 Flower 版本库中的分支main。The title should be changed to adhere to the PR title format guidelines, otherwise it won't be possible to merge the PR. So in this case, a correct title might be
docs(framework:skip) Fix typos.中间的输入框供您描述 PR 的作用,并将其与现有问题联系起来。我们在此放置了注释(一旦 PR 打开,注释将不会显示),以指导您完成整个过程。
It is important to follow the instructions described in comments.
在底部,您可以找到打开 PR 的按钮。这将通知审核人员新的 PR 已经打开,他们应该查看该 PR 以进行合并或要求修改。
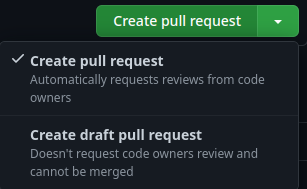
如果您的 PR 尚未准备好接受审核,而且您不想通知任何人,您可以选择创建一个草案拉取请求:
- 作出新的改变
一旦 PR 被打开(无论是否作为草案),你仍然可以像以前一样,通过修改与 PR 关联的分支来推送新的提交。
- 审查 PR
一旦 PR 被打开或 PR 草案被标记为就绪,就会自动要求代码所有者进行审核:
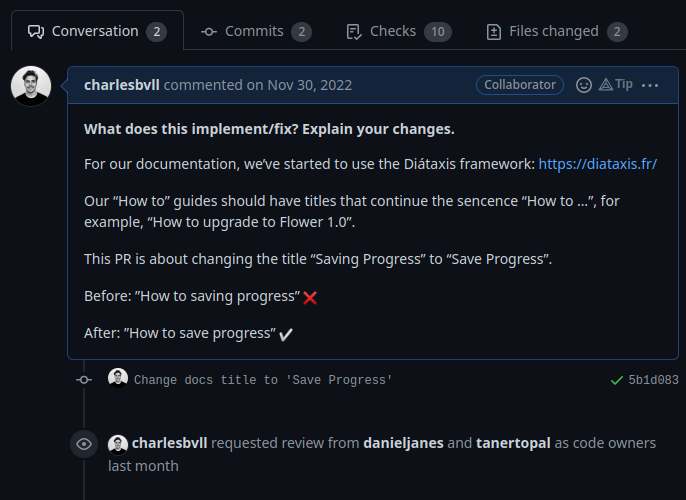
然后,代码所有者会查看代码、提出问题、要求修改或验证 PR。
如果有正在进行的更改请求,合并将被阻止。
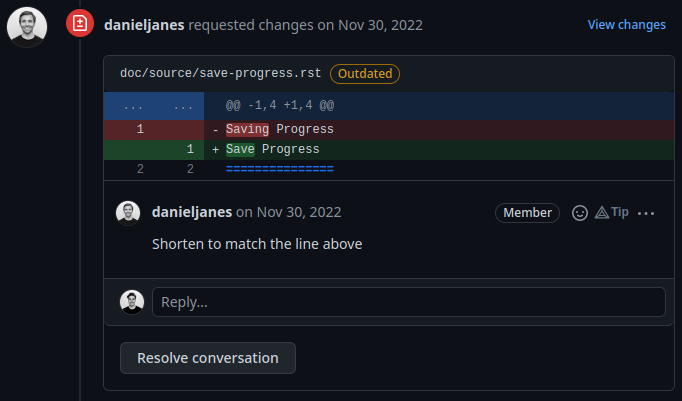
要解决这些问题,只需将必要的更改推送到与 PR 关联的分支即可:

并解决对话:
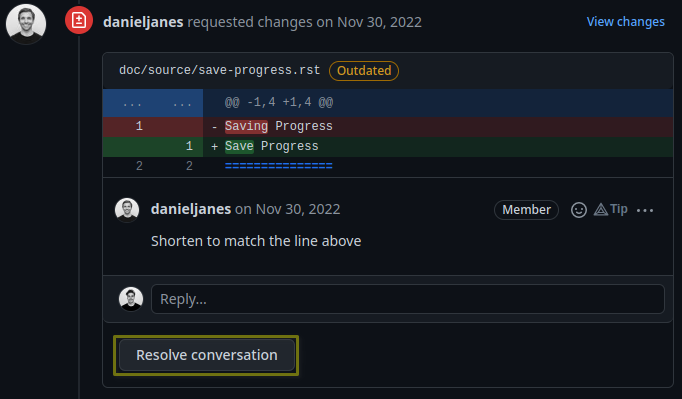
一旦所有对话都得到解决,您就可以重新申请审核。
- 一旦 PR 被合并
如果所有自动测试都已通过,且审核员不再需要修改,他们就可以批准 PR 并将其合并。
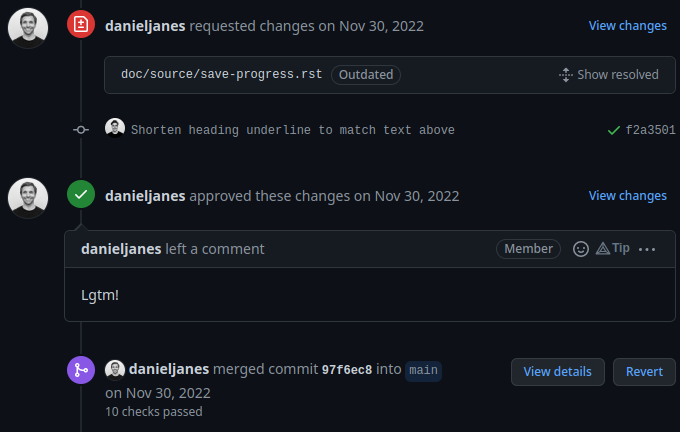
合并后,您可以在 GitHub 上删除该分支(会出现一个删除按钮),也可以在本地删除该分支:
$ git switch main
$ git branch -D <branch_name>
然后,你应该更新你的分叉仓库:
$ git pull upstream main # to update the local repository
$ git push origin main # to push the changes to the remote repository
首次捐款实例
问题
For our documentation, we've started to use the Diàtaxis framework.
Our "How to" guides should have titles that continue the sentence "How to …", for example, "How to upgrade to Flower 1.0".
我们的大多数指南还没有采用这种新格式,而更改其标题(不幸的是)比人们想象的要复杂得多。
This issue is about changing the title of a doc from present continuous to present simple.
Let's take the example of "Saving Progress" which we changed to "Save Progress". Does this pass our check?
Before: "How to saving progress" ❌
After: "How to save progress" ✅
解决方案
This is a tiny change, but it'll allow us to test your end-to-end setup. After cloning and setting up the Flower repo, here's what you should do:
Find the source file in
framework/docs/sourceMake the change in the
.rstfile (beware, the dashes under the title should be the same length as the title itself)Build the docs and check the result
重命名文件
您可能已经注意到,文件名仍然反映了旧的措辞。如果我们只是更改文件,那么就会破坏与该文件的所有现有链接--避免这种情况是***重要的,破坏链接会损害我们的搜索引擎排名。
Here's how to change the file name:
Change the file name to
save-progress.rstAdd a redirect rule to
framework/docs/source/conf.py
This will cause a redirect from saving-progress.html to save-progress.html, old
links will continue to work.
应用索引文件中的更改
For the lateral navigation bar to work properly, it is very important to update the
index.rst file as well. This is where we define the whole arborescence of the
navbar.
Find and modify the file name in
index.rst
开放式 PR
Commit the changes (commit messages are always imperative: "Do something", in this case "Change …")
将更改推送到分叉
Open a PR (as shown above) with title
docs(framework) Update how-to guide title等待审批!
祝贺你 🥳 您现在正式成为 "Flower "贡献者!
接下来的步骤
一旦您完成了第一份 PR,并希望做出更多贡献,请务必查看以下内容:
Good first contributions, where you should particularly look into the
baselinescontributions.
附录
PR title format
We enforce the following PR title format:
<type>(<project>) <subject>
(or <type>(<project>:skip) <subject> to ignore the PR in the changelog)
Where <type> needs to be in {ci, fix, feat, docs, refactor, break},
<project> should be in {framework, baselines, datasets, examples, or '*' when
modifying multiple projects which requires the ':skip' flag to be used}, and
<subject> starts with a capitalised verb in the imperative mood.
Valid examples:
feat(framework) Add flwr build CLI commandrefactor(examples:skip) Improve quickstart-pytorch loggingci(*:skip) Enforce PR title format
Invalid examples:
feat(framework): Add flwr build CLI command(extra:)feat(*) Add flwr build CLI command(missingskipflag along with*)feat(skip) Add flwr build CLI command(missing<project>)feat(framework) add flwr build CLI command(non capitalised verb)feat(framework) Add flwr build CLI command.(dot at the end)Add flwr build CLI command.(missing<type>(<project>))