Write your first Flower App
Welcome to the second part of the Flower collaborative AI tutorial!
In the previous tutorial, you ran an existing Flower App on SuperGrid using your default workspace simulation federation. This allowed you to experiment with simulated SuperNodes and explore the dashboard to follow the app’s progress and view its logs.
In this tutorial, you’ll pull the @flwrlabs/demo app from Flower Hub and run it on SuperGrid
from your local machine. You’ll then make a small change to the ServerApp, run the
app again, and confirm in the SuperGrid logs that your custom messages are now part of
the app’s behavior. In the second half of the tutorial, you’ll step back from the
hands-on workflow to get a high-level introduction to the main components of a Flower
App and see, in concrete terms, how the demo app uses those components together.
Tip
Star Flower on GitHub ⭐️ and join the Flower community on Flower Discuss or Flower Slack to introduce yourself, ask questions, and get help.
Let’s get started! 🌼
Preparation
In this tutorial, you’ll edit the code of an existing Flower App that you’ll pull from
the Flower Hub. In order to do that, you’ll need to install flwr, the Flower Python
package. What follows is a brief guide on how this can be done:
Installing dependencies
First, we install the Flower package flwr in a new Python environment.
$ pip install -U flwr
Then, use flwr new to fetch an existing Flower App from the Flower Hub. In this
case, you’ll fetch the @flwrlabs/demo app.
$ flwr new @flwrlabs/demo
After running it you’ll notice a new directory named demo has been created in the
directory you executed the above command from. It should have the following structure:
demo
├── quickstart_numpy
│   ├── __init__.py
│   ├── client_app.py   # Defines your ClientApp
│   ├── server_app.py   # Defines your ServerApp
│   └── task.py         # Defines your model, training and data loading
├── pyproject.toml      # Project metadata like dependencies and configs
└── README.md
You did it! You have pulled an existing Flower App from the Flower Hub. Open the
demo directory in your code editor of choice, then advance to the next section to
learn how to run this app in SuperGrid. Later, you’ll learn about the core components of
a Flower App.
Run the app on SuperGrid
Note
If you haven’t already, make sure to complete the first tutorial in this series to set up your SuperGrid account and run a demo app on SuperGrid directly from the Flower Hub.
In the previous tutorial, you ran the demo app on SuperGrid directly from Flower Hub. Now that you have the app code on your machine, you can run it from there instead. This is a crucial step towards customizing the app and making it your own.
Open a terminal, activate your Python environment, and run the following command to first login to SuperGrid:
# This will open a browser window where you can enter your SuperGrid credentials.
$ flwr login supergrid
Once you are logged in, run the following command to run the app on SuperGrid:
# Navigate to the directory of the app you want to run
$ cd /path/to/demo
# Run the app on SuperGrid
$ flwr run . supergrid
Then, visit the All runs page. You should see the new run in the list. Click it to see the run details and logs.
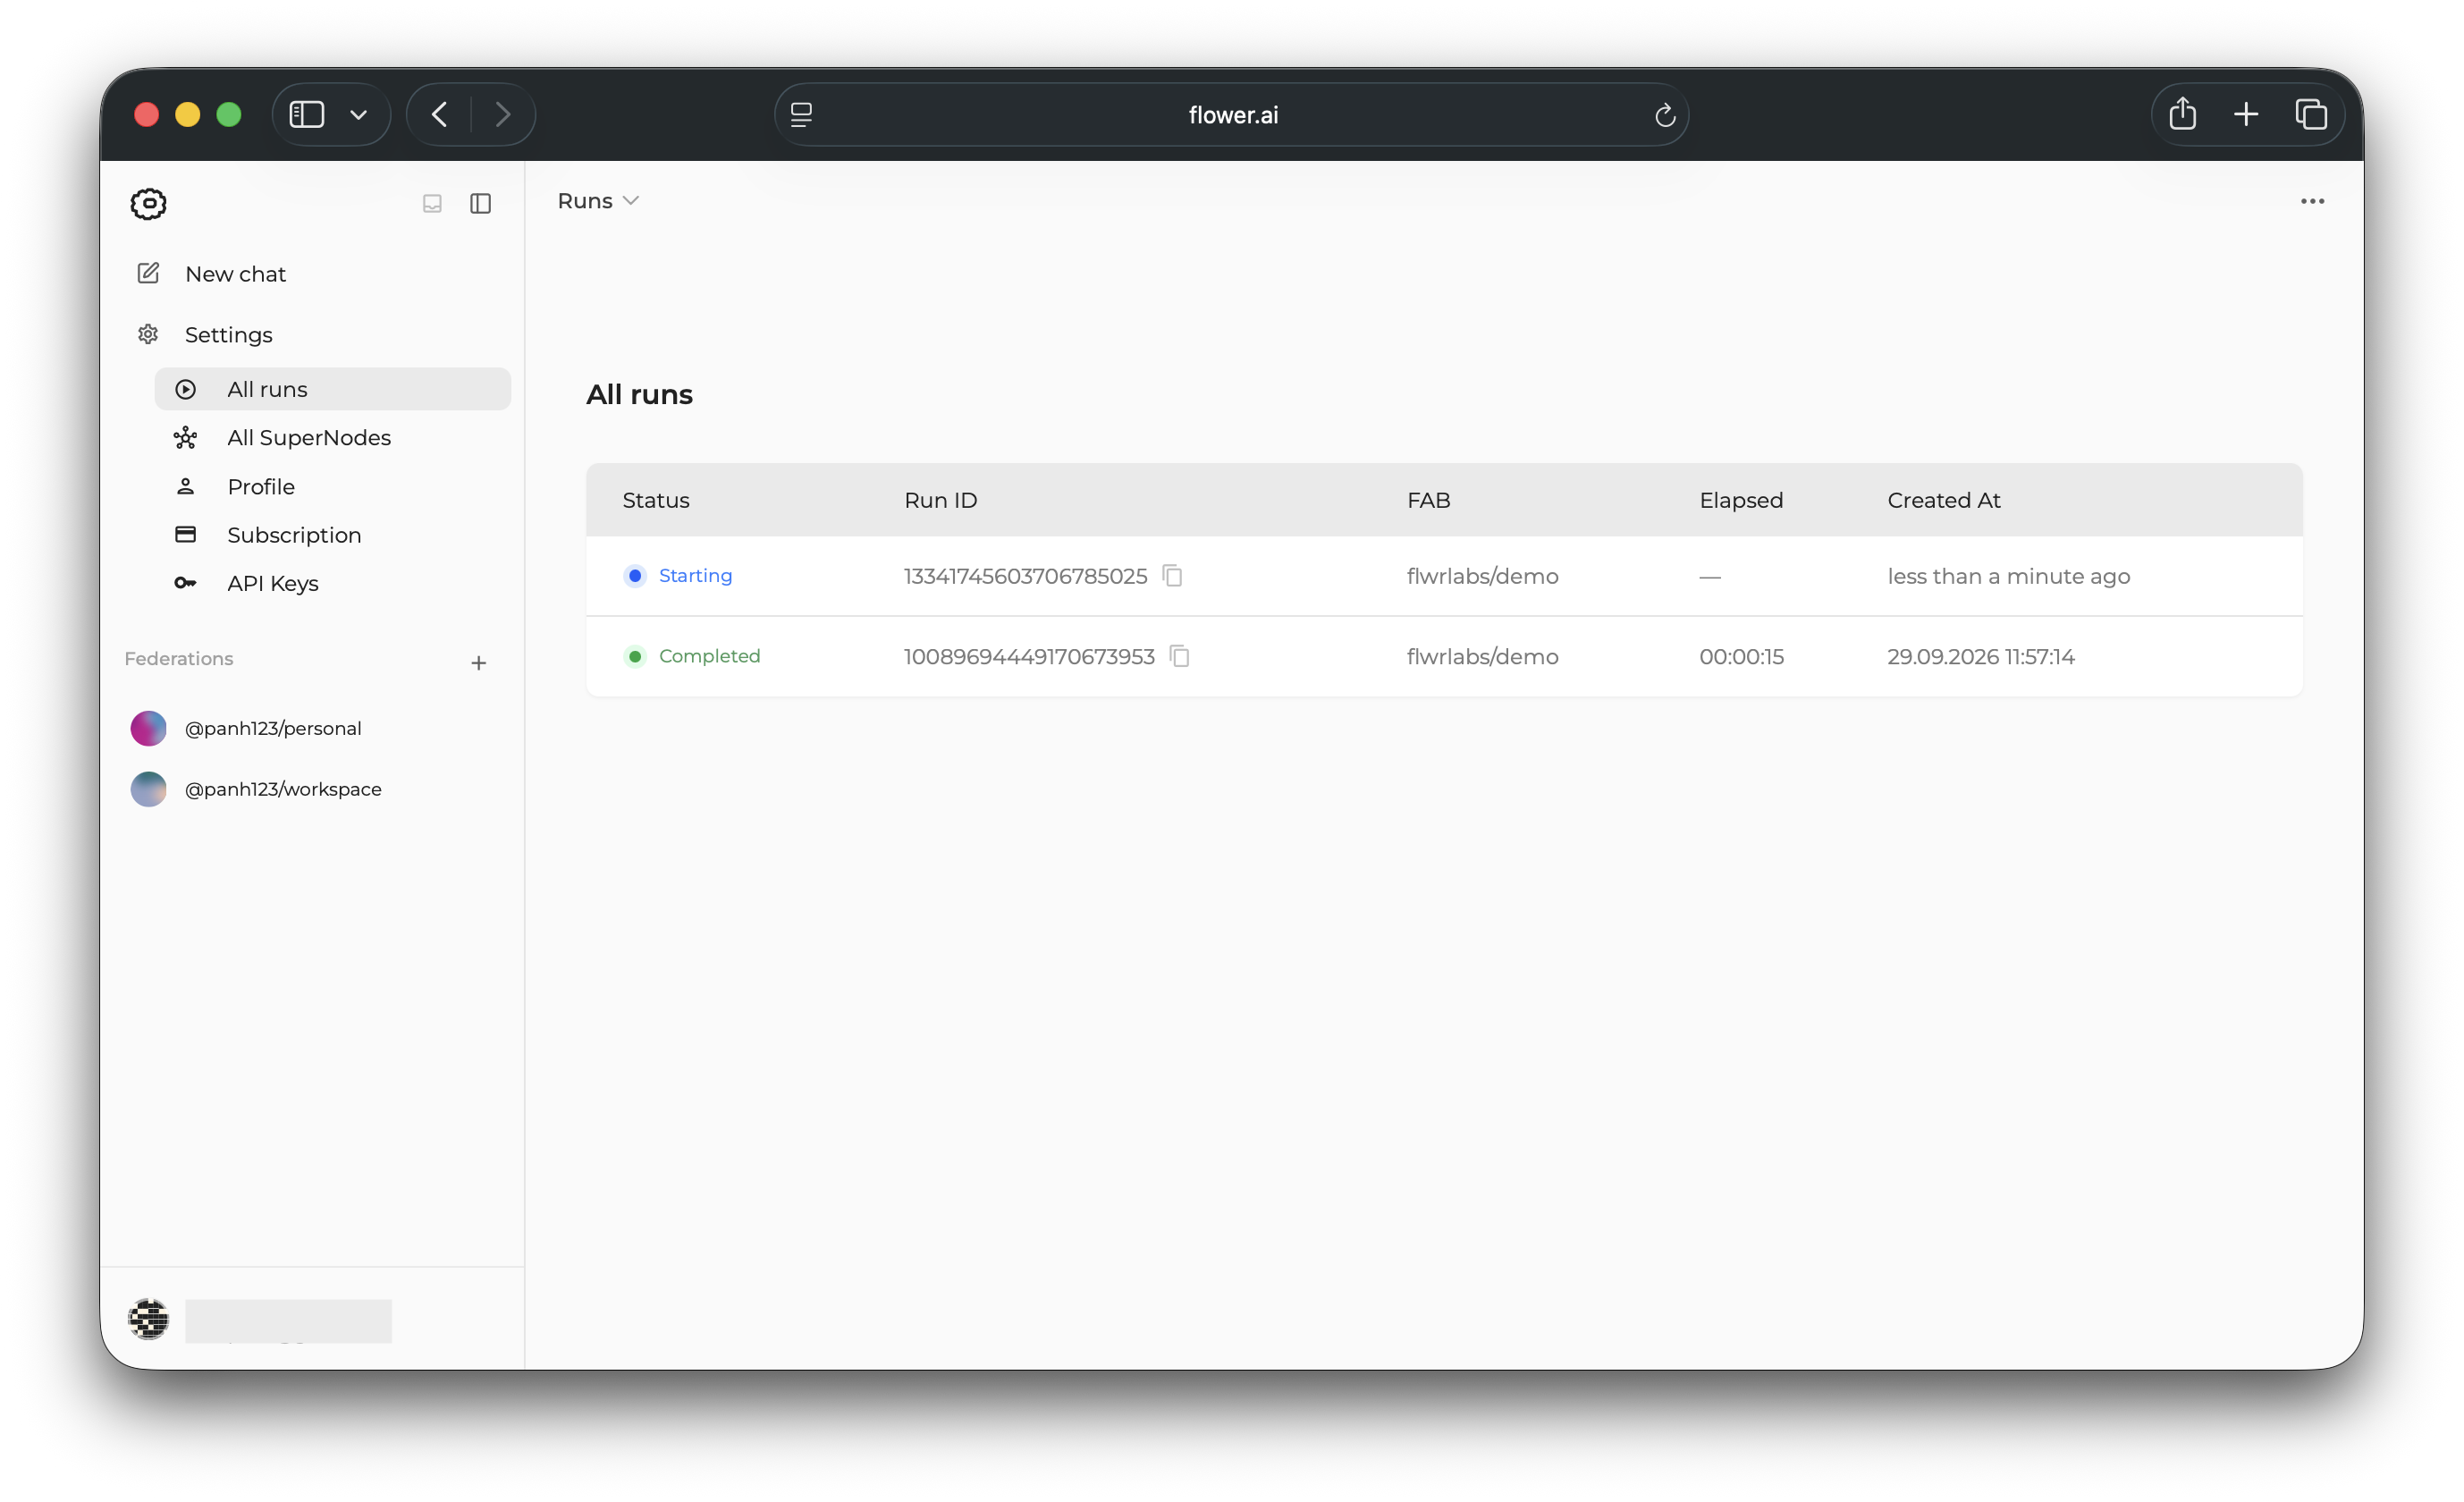
If you inspect the logs, you should see the same output as when you ran the app directly from the Flower Hub in the previous tutorial. This is because you are running the exact same app. In the next section, we’ll make a small modification to the app that will reflect in the logs and make it your own!
Customizing your App
Now that you have the app running on SuperGrid, you can start customizing it. In this
tutorial you’ll make a small customization to the ServerApp to print a message
before the federated learning begins and just before the app exits. Open the demo
directory in your code editor of choice and open the quickstart_numpy/server_app.py.
Then, add the following two lines to the main() function:
@app.main()
def main(grid: Grid, context: Context) -> None:
    """Main entry point for the ServerApp."""

    print("👋 Hello from the ServerApp! This is a custom message that I added.")
    # Read run config
    num_rounds: int = context.run_config["num-server-rounds"]

    # Load global model
    model = get_dummy_model()
    arrays = ArrayRecord(model)

    # Initialize FedAvg strategy
    strategy = FedAvg()

    # Start strategy, run FedAvg for `num_rounds`
    result = strategy.start(
        grid=grid,
        initial_arrays=arrays,
        num_rounds=num_rounds,
    )
    print("Goodbye from the ServerApp! This is my first custom Flower App 🚀!")
If you now run the app again, you should see the new messages in the logs of your run on SuperGrid:
# Run your app
$ flwr run . supergrid
Then, visit the All runs page, open the new run, and
inspect its logs. You should see the new messages printed by the ServerApp at the
beginning and end of the logs.
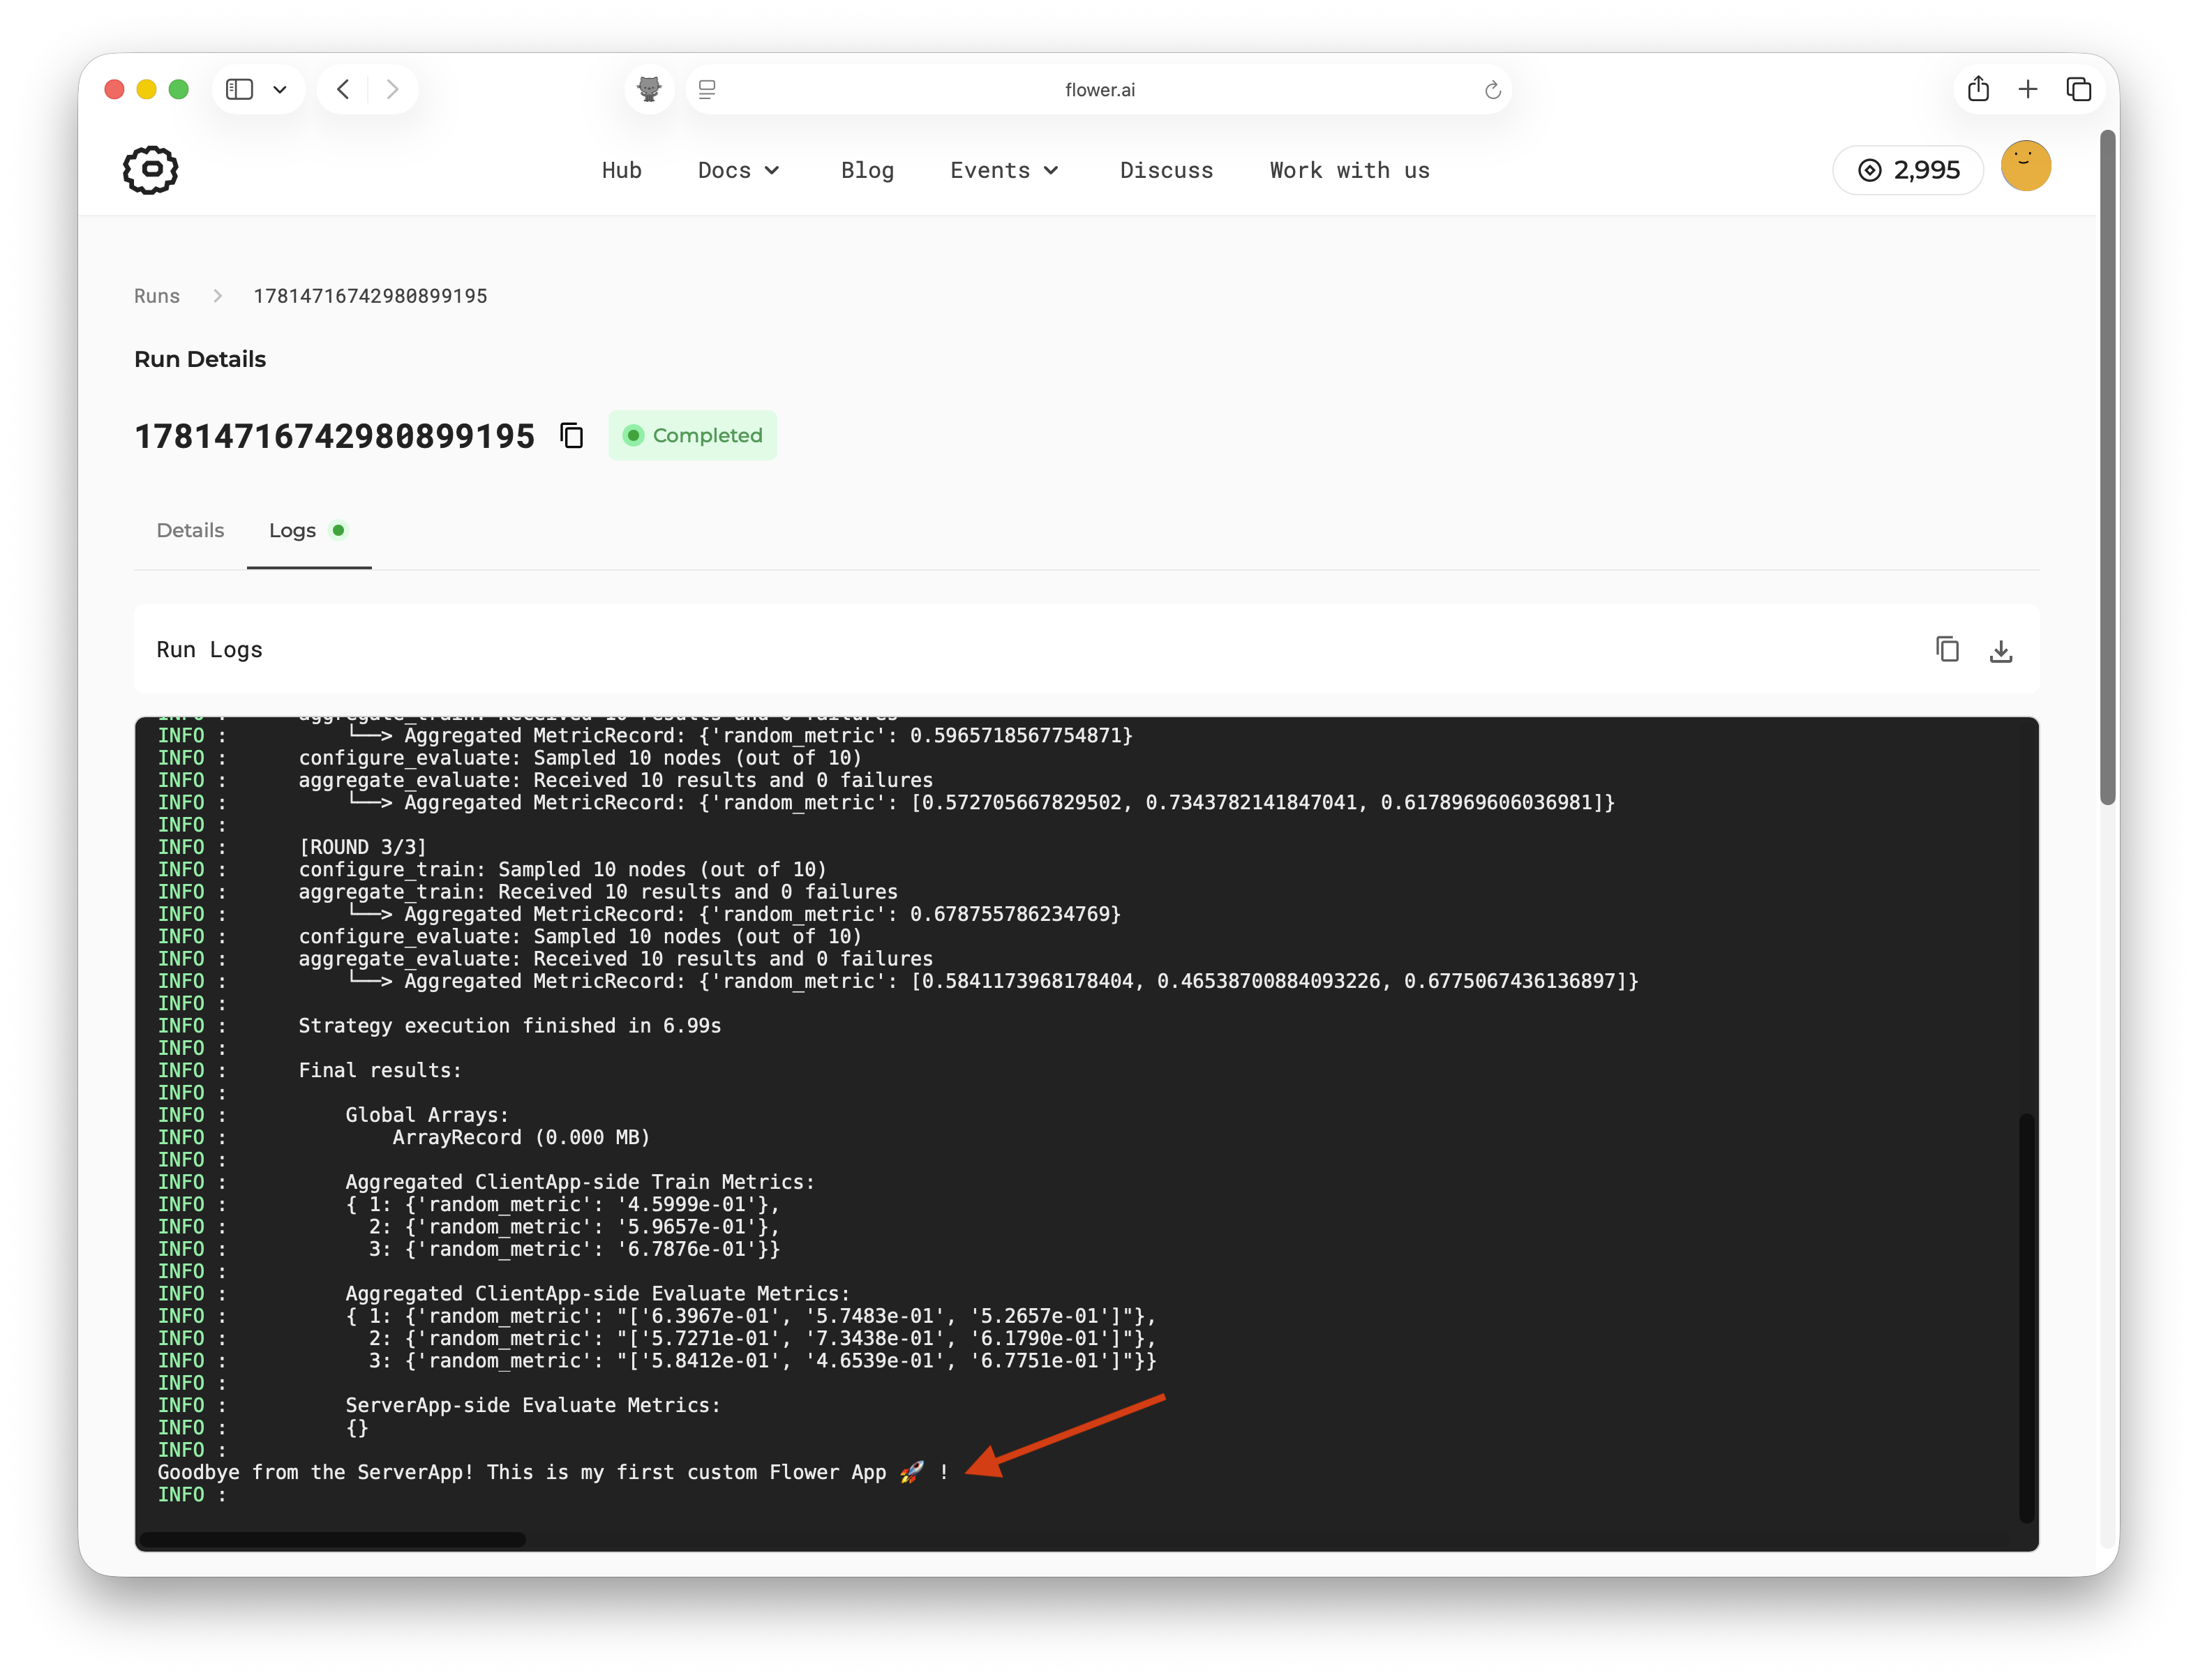
You did it! You have successfully customized an existing Flower App and run it on
SuperGrid. So far you have learned about two powerful Flower commands (flwr new and
flwr run) that allow you to pull existing apps from the Flower Hub and run them on
SuperGrid. flwr new is a great way to get started with a new app that you can
customize for your needs.
In the next section, you’ll learn about the main components of a Flower App and how they work together, using the demo app as a concrete example.
Flower App Components
All Flower Apps follow the same basic structure, which is designed to be flexible and powerful enough to support a wide variety of collaborative AI workloads including federated learning, federated analytics, distributed training, and more. The main components of a Flower App are:
ServerApp: the server-side entry point for a run. In a typical federated learning setup, it defines how the run starts, which initial model is used, which strategy controls the federated learning process, and how many rounds to execute. A Flower App can also be built with a custom strategy or no strategy at all.ClientApp: the code that runs on each client (SuperNode). It defines what should happen when a SuperNode receives instructions from the server side, for example “train this model on your local data” or “evaluate this model on your local data” or, in general, “do x with your local data”.pyproject.toml: the app configuration file. It declares project metadata and dependencies, tells Flower where to import theServerAppandClientAppfrom, and stores run configuration (e.g. hyperparameters) that the app can read at runtime.
In summary, you can think of the ServerApp as the place where the federated run is
launched, the Strategy as the algorithm that coordinates each round, and the
ClientApp as the code each participating SuperNode executes. The ServerApp and
ClientApp exchange Message objects through SuperGrid. Depending on the logic of
the app, these messages can contain instructions or queries, model parameters, training
metrics, or any other information that needs to be communicated between the server and
SuperNodes during the run.
How the demo app uses these components
The @flwrlabs/demo app is built as a deliberately small NumPy example so the Flower
structure is easy to see.
In quickstart_numpy/server_app.py, the ServerApp is created and defines its main
entry point with @app.main(). When a run starts, this function:
reads
num-server-roundsfromcontext.run_config;creates the initial global model by calling
get_dummy_model()fromquickstart_numpy/task.py; For simplicity, the model is just a list of a single NumPy array, but in a real app it could be a more complex object such as a PyTorch model.wraps the model arrays in an
ArrayRecordso Flower can send them to SuperNodes;creates a
FedAvgstrategy;launches the strategy by calling
strategy.start().
In quickstart_numpy/client_app.py, a ClientApp is created and defines two
handlers:
@app.train()receives the current global model array, simulates local training by adding random noise to it, then replies with the updated array and a few metrics.@app.evaluate()receives the current global model array and replies with evaluation metrics. It does not return an updated array because evaluation does not change the model.
The strategy connects these two sides. In this demo, FedAvg sends the current global
array to selected ClientApp instances for training, waits for their replies, and
aggregates the returned arrays into the next global model.
Note
In a real app, the ClientApp would likely have a more complex logic, for example
it could load a model and data, perform actual training and evaluation, and return
updated model parameters and training metrics to the server. In the next tutorial
you’ll see a more complex example of a Flower App that uses PyTorch and real
training and evaluation logic.
Finally, pyproject.toml makes the app components discoverable and configurable. The
[tool.flwr.app.components] section points Flower to the objects it should import:
serverapp = "quickstart_numpy.server_app:app"
clientapp = "quickstart_numpy.client_app:app"
The [tool.flwr.app.config] section defines values available at runtime through
context.run_config. In this demo, it sets:
num-server-rounds = 3
That is the value the ServerApp reads to decide how many federated learning rounds
the FedAvg strategy should run. In a real app, you could have many more
configuration values such as learning rate, batch size, and more.
Final Remarks
Congratulations, you have successfully run your first custom Flower App on SuperGrid! You have also learned about the main components of a Flower App and how they work together to enable collaborative AI workloads across a federation of SuperNodes.
Tip
This tutorial runs the app on SuperGrid with simulated SuperNodes. To run Flower Apps on SuperGrid with the Deployment Runtime instead, create a deployment federation in the SuperGrid dashboard and connect real SuperNodes to it. See Create and Manage Federations on SuperGrid and Connect SuperNodes to SuperGrid.
In the next tutorial, you will take a look at a more complex Flower App that uses PyTorch and real training and evaluation logic. You will also learn how to run a Flower App locally on your machine, which is ideal for development and debugging before running on SuperGrid.
Next steps
Before you continue, make sure to join the Flower community on Flower Discuss (Join Flower Discuss) and on Slack (Join Slack).
There’s a dedicated #questions Slack channel if you need help, but we’d also love to
hear who you are in #introductions!
The Flower Collaborative AI Tutorial - Part 3: Write a Flower App for a PyTorch model presents a more advanced Flower App that uses PyTorch and real training and evaluation logic.