Exécutez Flower sur Red Hat OpenShift
Dans ce guide, vous allez apprendre à créer, déployer et exécuter une application Flower sur la Red Hat OpenShift (RHOS) plateforme d’application. La plateforme sera hébergée dans AWS et nous allons suivre les étapes pour installer le cluster sur un infrastructure provisionnée par l’installateur en utilisant le Red Hat OpenShift Service on AWS.
Connectez-vous à la console Red Hat OpenShift
Commencez par vous connecter à votre Red Hat Hybrid Cloud Console et cliquez sur le lien OpenShift dans la carte Red Hat OpenShift.
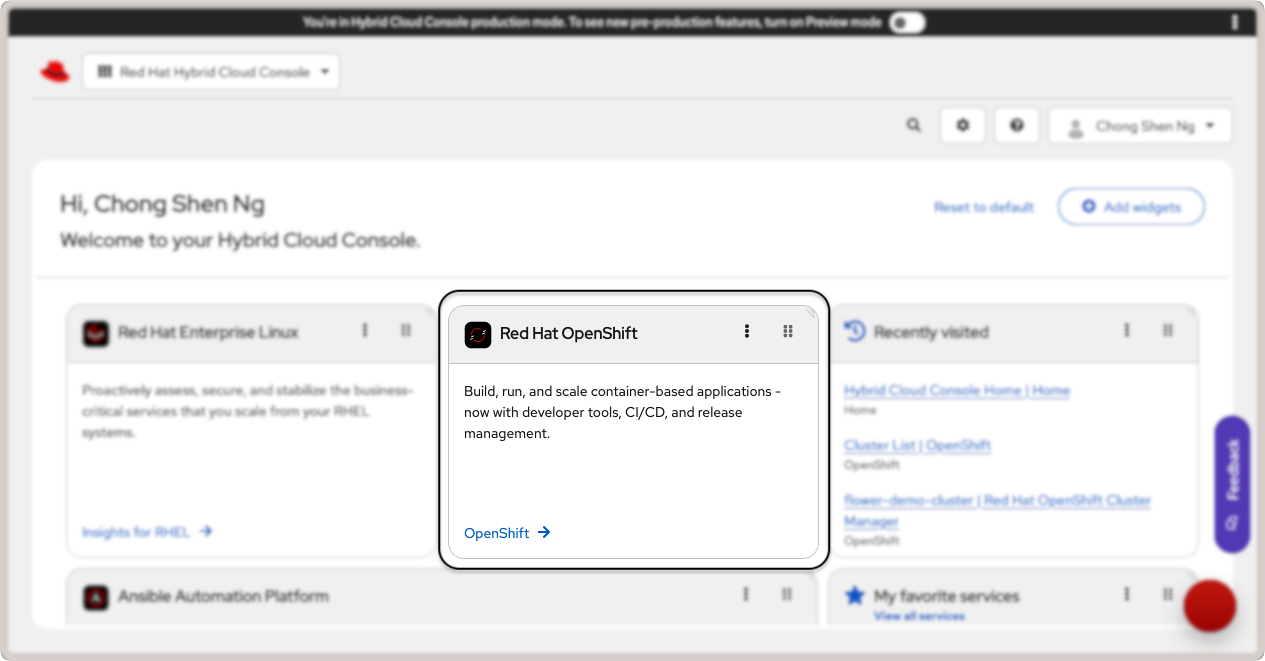
Lien vers Red Hat OpenShift dans la console cloud.
Cela vous emmènera vers la console OpenShift. Dans Overview, cherchez la carte Red Hat OpenShift Service on AWS (ROSA) et cliquez sur Create Cluster. Vous serez redirigé vers la page pour configurer un service Red Hat OpenShift sur AWS. Il existe deux pré-requis que vous devez remplir avant de pouvoir créer un cluster :
Prérequis AWS - Configurez votre compte AWS pour déployer ROSA.
Prérequis ROSA - Installez l’outil CLI ROSA sur votre système et connectez-vous à votre compte Red Hat.
Terminez les prérequis AWS
Suivez les étapes nécessaires pour satisfaire les prérequis d’AWS pour créer et gérer un cluster Red Hat OpenShift :
Activer le service RHOS sur AWS (ROSA) dans votre compte AWS.
Assurez-vous d’avoir suffisamment de quotas de services pour ROSA.
Créez un rôle lié au service pour Elastic Load Balancing. Cela devrait être automatiquement créé pour vous si ce n’est pas présent.
Liez votre compte AWS et Red Hat.
Créez des rôles d’identité et de gestion d’accès (IAM) AWS. Vous aurez besoin de créer un utilisateur IAM avec ces permissions requises :
AmazonEC2FullAccessAWSCloudFormationFullAccessIAMFullAccessServiceQuotasReadOnlyAccess
Pour plus de détails, consultez le guide de démarrage rapide RHOS depuis votre console AWS.
Terminez les prérequis ROSA
Suivez les étapes montrées dans la section pour télécharger et installer l’outil CLI ROSA.
Ensuite, installez l’outil CLI aws pour votre système. Vous pouvez également le lancer avec Docker en utilisant la commande :
docker run --rm -it --volume ~/.aws:/root/.aws public.ecr.aws/aws-cli/aws-cli
L’option --volume ~/.aws:/root/.aws monte vos clés AWS au conteneur Docker. Ensuite, exécutez les commandes suivantes pour configurer l’outil CLI AWS et fournir vos clés AWS pour l’utilisateur IAM que vous avez créé plus tôt :
➜ aws configure
AWS Access Key ID [None]: [...]
AWS Secret Access Key [None]: [...]
Default region name [None]: [...]  # your region
Default output format [None]: table  # the recommended output format
Téléchargez et installez l’outil CLI ROSA en suivant les instructions pour votre système d’exploitation. Une fois que vous avez installé l’outil CLI ROSA, connectez-vous avec votre compte Red Hat :
➜ rosa login --use-auth-code
I: You will now be redirected to Red Hat SSO login
I: Token received successfully
I: Logged in as '[...]' on 'https://api.openshift.com'
I: To switch accounts, logout from https://sso.redhat.com and run `rosa logout` before attempting to login again
Si vous êtes déjà connecté à votre compte Red Hat dans votre navigateur, vous serez redirigé vers votre terminal.
Ensuite, créez les rôles et politiques d’account-wide nécessaires :
➜ rosa create account-roles --mode auto
Finalement, créez un réseau privé virtuel (VPC) pour votre cluster :
➜ rosa create network
...
INFO[0177] Stack rosa-network-stack-[...] created
Avec les prérequis AWS et ROSA terminés, vous êtes maintenant prêt à déployer un cluster.
Créez un cluster Red Hat OpenShift sur AWS
Il existe trois façons de créer le cluster : via l’interface graphique rosa CLI, interface web, ou avec Terraform. Pour ce guide, nous utiliserons l’interface graphique. Cliquez sur le bouton Create with web interface dans la carte Deploy with web interface :
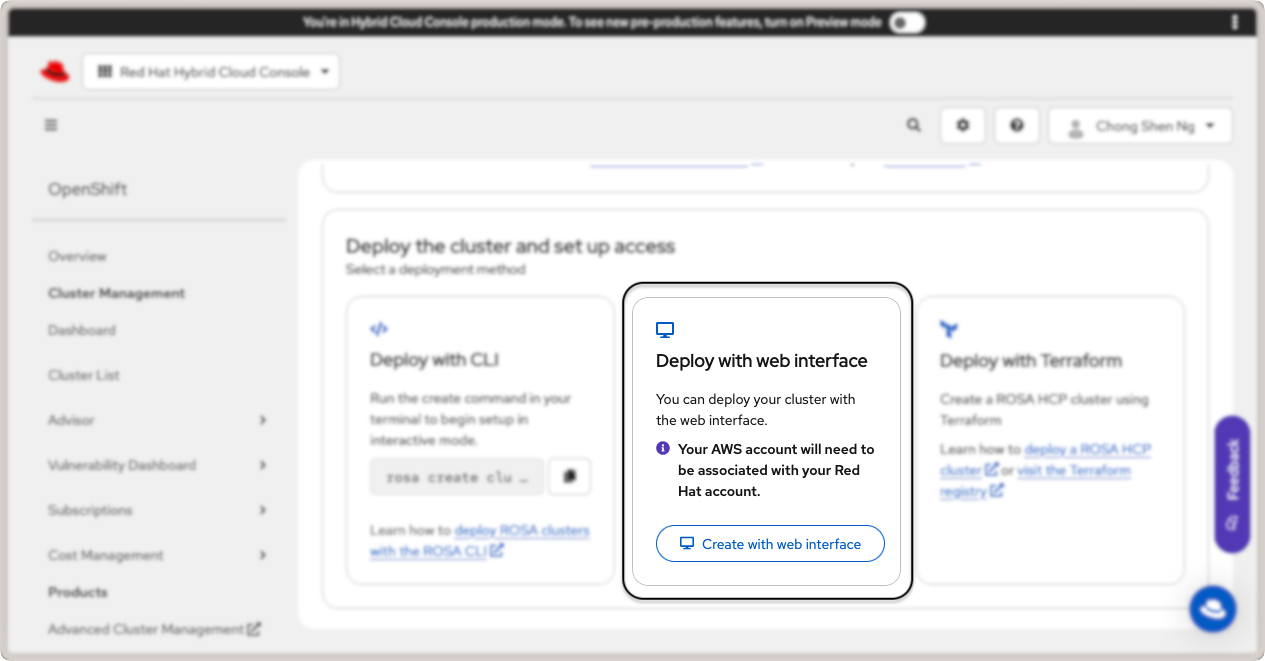
Déployez un cluster Red Hat OpenShift avec interface web.
Vous serez amené à une série d’étapes pour créer un cluster ROSA. Dans la suite, certaines étapes clés sont mis en évidence et nous vous recommandons de suivre le guide officiel dans la console Cloud Red Hat pour plus de détails.
Définir le Plan de Contrôle - Sélectionnez l’architecture ROSA hôte et cliquez sur
Next.Comptes et Rôles - Assurez-vous que les détails d’infrastructure et facturation sont corrects et cliquez sur
Next.Paramètres du cluster
Détails - Spécifiez
flower-demo-clustercommeCluster name. Pour ce guide, sélectionnez la version4.18.22(vous pouvez sélectionner une version plus récente qui convient à vos besoins). Sélectionnez la région AWS appropriée pour votre compte AWS.Pool de Machines - Sélectionnez un type d’instance EC2 compute disponible dans votre région. Dans ce guide, nous utilisons la région
eu-north-1, et donc sélectionnonsm6i.2xlarge - 8 vCPU 32 GiB RAM. Activez l’échelle automatique et fixez le nombre minimum de nœuds à 2 et maximum à 4. Cela permet au cluster d’escalader lors du déploiement de la plateforme OpenShift et de l’IA OpenShift dans le même cluster.
Networking
Configuration - Sous « Confidentialité du cluster », sélectionnez
publicet laissez les autres valeurs par défaut.Plages CIDR - Laissez les plages CIDR par défaut comme elles sont.
Rôles et politiques du cluster - Suivez les étapes pour créer une nouvelle configuration ID OIDC.
Mises à jour du cluster - Laissez les paramètres par défaut comme ils sont pour « Mises à jour récurrentes ».
Finalement, passez en revue les détails du cluster et cliquez sur
Create cluster.
Cela commencera le processus de création du cluster et peut prendre quelques minutes. Vous pourrez suivre l’état d’installation du plan de contrôle et des pools de machines dans la page « Aperçu ».
Une fois votre cluster créé, vous serez invité à créer un fournisseur d’identité pour accéder au cluster. Cliquez sur le lien Create identity provider et suivez les étapes pour votre fournisseur OIDC préféré. Accordez aux utilisateurs de votre fournisseur OIDC les droits cluster-admin afin que vous puissiez ajouter des applications à partir du OperatorHub plus tard. Pour ce faire, allez dans Access control, onglet Cluster Roles and Access, et cliquez sur Add user. Entrez l’ID utilisateur de votre fournisseur OIDC et enregistrez les modifications.
Votre cluster est maintenant prêt. Pour afficher les détails du cluster, cliquez sur le lien Cluster List dans la barre latérale gauche. Cliquez sur le nom de votre cluster (flower-demo-cluster) pour afficher les détails du cluster :
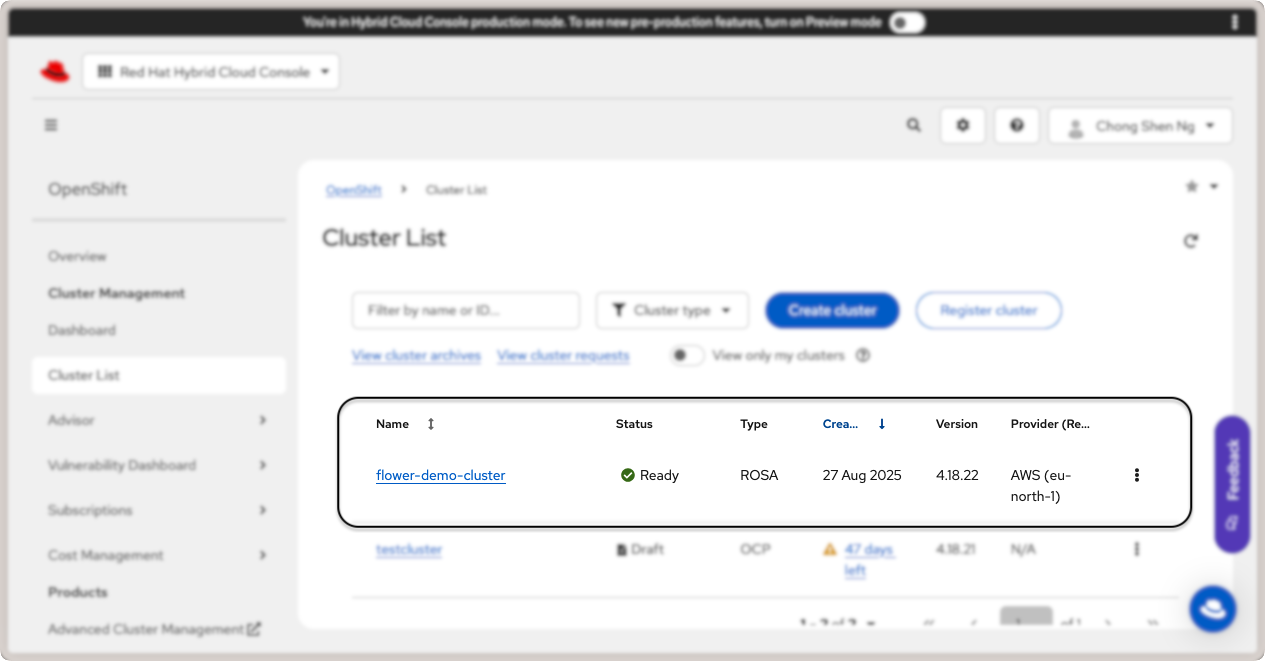
Détails du cluster Red Hat OpenShift.
Pour accéder à la console web OpenShift, cliquez sur le lien Open console en haut à droite. Vous serez redirigé vers votre fournisseur OIDC pour vous connecter. Une fois connecté, vous serez emmené vers la console web OpenShift :
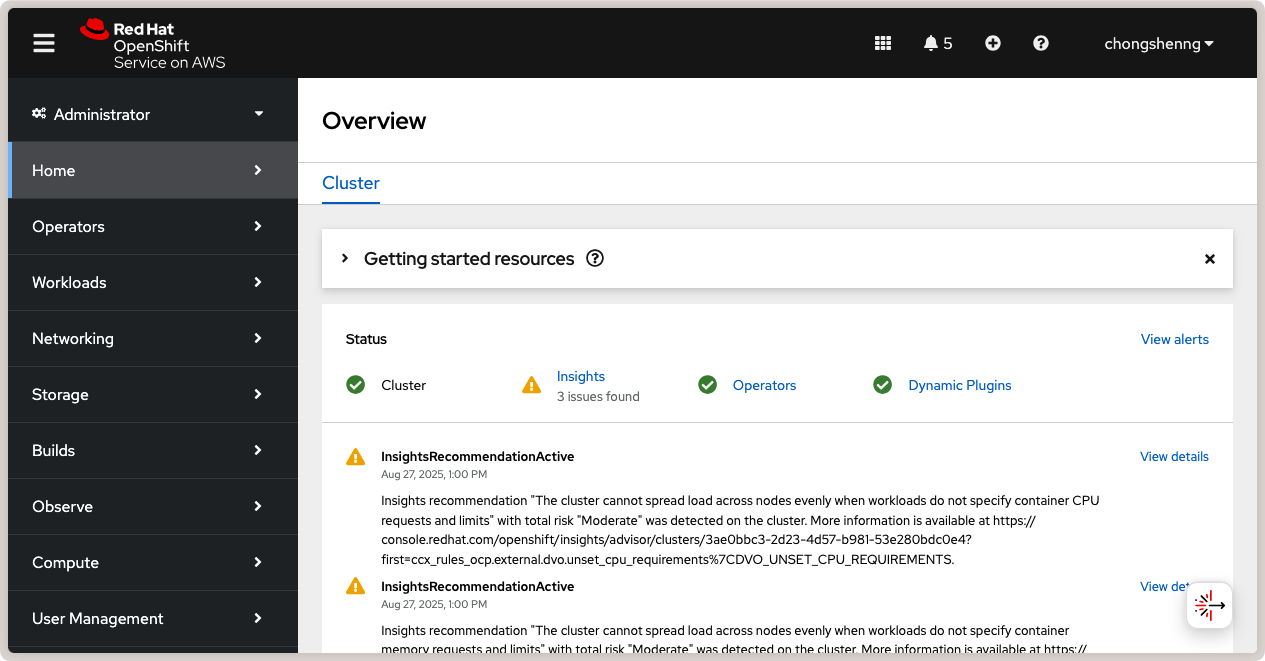
Console web Red Hat OpenShift.
Félicitations ! Vous avez maintenant un cluster Red Hat OpenShift fonctionnel sur AWS. Maintenant, voyons comment déployer Flower sur votre cluster OpenShift.
Déployer Flower SuperLink et SuperNodes sur OpenShift
Une fois le cluster OpenShift actif, nous pouvons désormais déployer des pods SuperLink et SuperNode et exécuter un workload fédéré. Dans ce guide, nous allons déployer quatre pods : 1x SuperLink, 2x SuperNodes et 1x pod de service pour router le trafic vers les ports spécifiés dans SuperLink.
Tout d’abord, nous devons créer un projet OpenShift qui est équivalent à un espace de noms Kubernetes. Nous allons ensuite déployer les pods SuperLink et SuperNode dans ce projet. Naviguez vers Home > Projects et cliquez sur le bouton Create Project à droite. Définissez flower-openshift-demo comme nom de projet.
Ensuite, nous allons ajouter des pods. Naviguez vers Workloads > Pods et cliquez sur le bouton Create Pod à droite. Il existe plusieurs façons de créer un pod, telles que l’utilisation d’une définition YAML ou JSON. Pour ce guide, nous utiliserons la définition YAML. Copiez et collez la définition YAML suivante pour le pod SuperLink. Ce manifeste est adapté de notre tutoriel sur how to deploy Flower in GCP.
superlink-deployment.yaml
apiVersion: apps/v1
kind: Deployment
metadata:
  name: superlink
  namespace: flower-openshift-demo # The project name from above
spec:
  replicas: 1
  selector:
    matchLabels:
      app: superlink
  template:
    metadata:
      labels:
        app: superlink
    spec:
      # Ensures mounted volumes are writable by the pod's non-root user on OpenShift
      securityContext:
        runAsNonRoot: true
      containers:
        - name: superlink
          image: flwr/superlink:1.33.0
          args:
            - "--insecure"
          ports: # which ports to expose/available
            - containerPort: 9092
              name: fleet
            - containerPort: 9093
              name: control
          volumeMounts:
            - name: cache-volume
              mountPath: /app/.cache
            - name: tmp-volume
              mountPath: /var/tmp
            - name: fab-volume
              mountPath: /app/.flwr
            - name: config-volume
              mountPath: /app/.config
      volumes:
        - name: cache-volume
          emptyDir:
            sizeLimit: 50Mi
        - name: tmp-volume
          emptyDir:
            sizeLimit: 50Mi
        - name: fab-volume
          emptyDir:
            sizeLimit: 50Mi
        - name: config-volume
          emptyDir:
            sizeLimit: 50Mi
Après la création du pod SuperLink, ajoutez le pod de service en suivant les étapes pour créer un pod et insérez la définition YAML suivante :
superlink-service.yaml
apiVersion: v1
kind: Service
metadata:
  name: superlink-service
  namespace: flower-openshift-demo
spec:
  selector:
    app: superlink
  ports:  # like a dynamic IP routing table/mapping that routes traffic to the designated ports
  - protocol: TCP
    port: 9092   # Port for SuperNode connection
    targetPort: fleet  # the SuperLink container port
    name: superlink-fleetapi
  - protocol: TCP
    port: 9093   # Port for Flower app submission
    targetPort: control  # the SuperLink container port
    name: superlink-controlapi
  type: LoadBalancer  # balances workload, makes the service publicly available
Finalement, lancez deux pods SuperNode avec les définitions YAML suivantes :
supernode-1-deployment.yaml
apiVersion: apps/v1
kind: Deployment
metadata:
  name: supernode-1
  namespace: flower-openshift-demo # The project name from above
spec:
  replicas: 1
  selector:
    matchLabels:
      app: supernode-1
  template:
    metadata:
      labels:
        app: supernode-1
    spec:
      # Ensures mounted volumes are writable by the pod's non-root user on OpenShift
      securityContext:
        runAsNonRoot: true
      containers:
      - name: supernode
        image: flwr/supernode:1.33.0
        args:
          - "--insecure"
          - "--superlink"
          - "superlink-service:9092"
          - "--clientappio-api-address"
          - "0.0.0.0:9094"
        ports:
        - containerPort: 9094
        volumeMounts:
        - name: cache-volume
          mountPath: /app/.cache
        - name: tmp-volume
          mountPath: /var/tmp
        - name: fab-volume
          mountPath: /app/.flwr
        - name: config-volume
          mountPath: /app/.config
      volumes:
      - name: cache-volume
        emptyDir:
          sizeLimit: 50Mi
      - name: tmp-volume
        emptyDir:
          sizeLimit: 50Mi
      - name: fab-volume
        emptyDir:
          sizeLimit: 50Mi
      - name: config-volume
        emptyDir:
          sizeLimit: 50Mi
supernode-2-deployment.yaml
apiVersion: apps/v1
kind: Deployment
metadata:
  name: supernode-2
  namespace: flower-openshift-demo # The project name from above
spec:
  replicas: 1
  selector:
    matchLabels:
      app: supernode-2
  template:
    metadata:
      labels:
        app: supernode-2
    spec:
      # Ensures mounted volumes are writable by the pod's non-root user on OpenShift
      securityContext:
        runAsNonRoot: true
      containers:
      - name: supernode
        image: flwr/supernode:1.33.0
        args:
          - "--insecure"
          - "--superlink"
          - "superlink-service:9092"
          - "--clientappio-api-address"
          - "0.0.0.0:9094"
        ports:
        - containerPort: 9094
        volumeMounts:
        - name: cache-volume
          mountPath: /app/.cache
        - name: tmp-volume
          mountPath: /var/tmp
        - name: fab-volume
          mountPath: /app/.flwr
        - name: config-volume
          mountPath: /app/.config
      volumes:
      - name: cache-volume
        emptyDir:
          sizeLimit: 50Mi
      - name: tmp-volume
        emptyDir:
          sizeLimit: 50Mi
      - name: fab-volume
        emptyDir:
          sizeLimit: 50Mi
      - name: config-volume
        emptyDir:
          sizeLimit: 50Mi
Pour visualiser l’état des pods qui viennent d’être déployés, cliquez sur le lien Workloads dans le panneau gauche. Vous devriez pouvoir voir trois pods Flower en état « Exécutant » comme montré dans la capture d’écran ci-dessous :
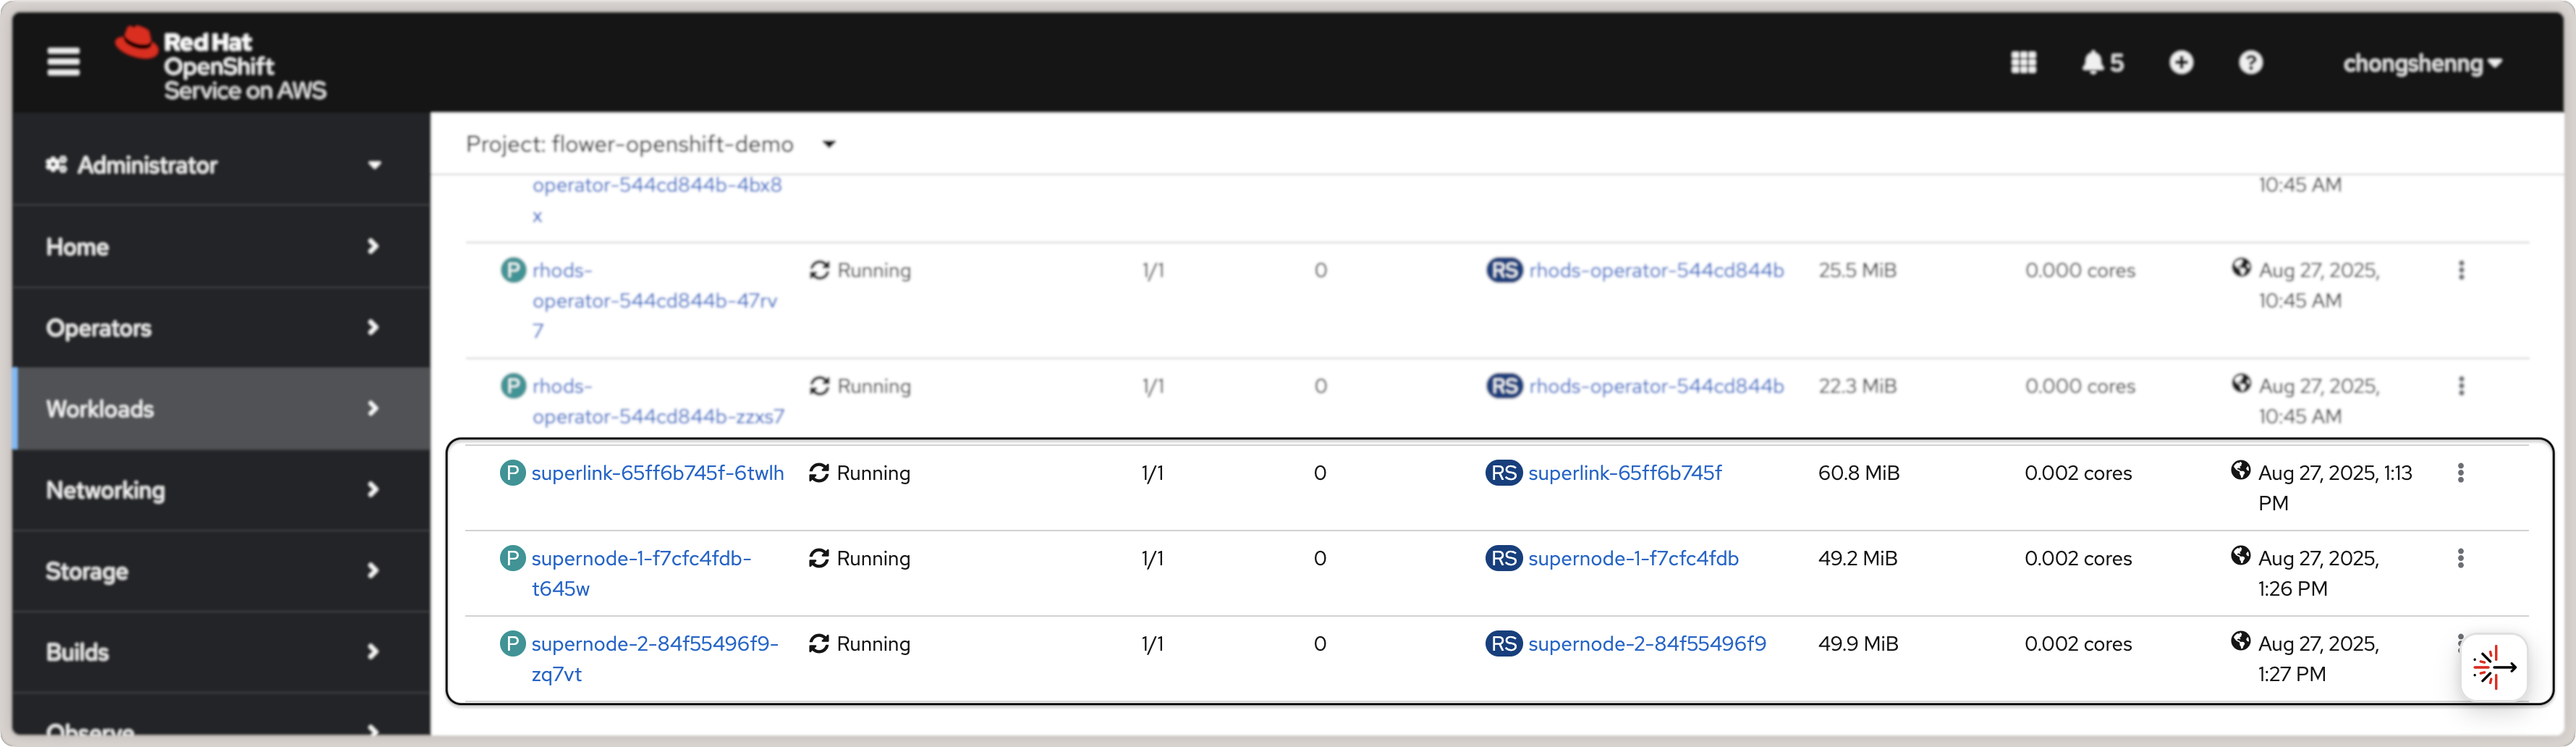
Pods Flower SuperLink et SuperNode dans Red Hat OpenShift.
Cliquez sur le pod SuperLink pour afficher les détails du pod et cliquez sur l’onglet Logs. Vous devriez pouvoir afficher les journaux SuperLink montrant deux SuperNodes connectés.
Astuce
Pour arrêter les pods, naviguez vers Workloads > Deployments, sélectionnez les pods déployés et cliquez sur Edit Pod Count pour fixer le nombre de répliques à 0. Maintenant, vous pouvez supprimer les pods en sélectionnant-les et en cliquant sur le bouton Delete Deployment.
Déployer l’intelligence artificielle collaborative Red Hat OpenShift
Pour interagir avec les SuperLink et SuperNodes déployés dans le cluster OpenShift, nous voulons profiter de la console d’atelier AI OpenShift. Par conséquent, nous devons activer cet Opérateur dans le cluster OpenShift.
Tout d’abord, assurez-vous que l’intelligence artificielle collaborative Red Hat OpenShift est activée via la console web Red Hat OpenShift. Vous pouvez activer une version d’essai si vous n’avez pas de souscription. Naviguez vers Operators > OperatorHub et recherchez Red Hat OpenShift AI. Cliquez sur le carton Red Hat OpenShift AI puis cliquez sur le bouton Install. Alternativement, installez l’Opérateur AI OpenShift via l’outil CLI OpenShift en suivant les instructions officielles here. Une fois l’installation terminée, vous devriez voir un signe de vérification vert sous la colonne Status pour l’Opérateur Red Hat OpenShift AI dans le panneau Installed Operators :
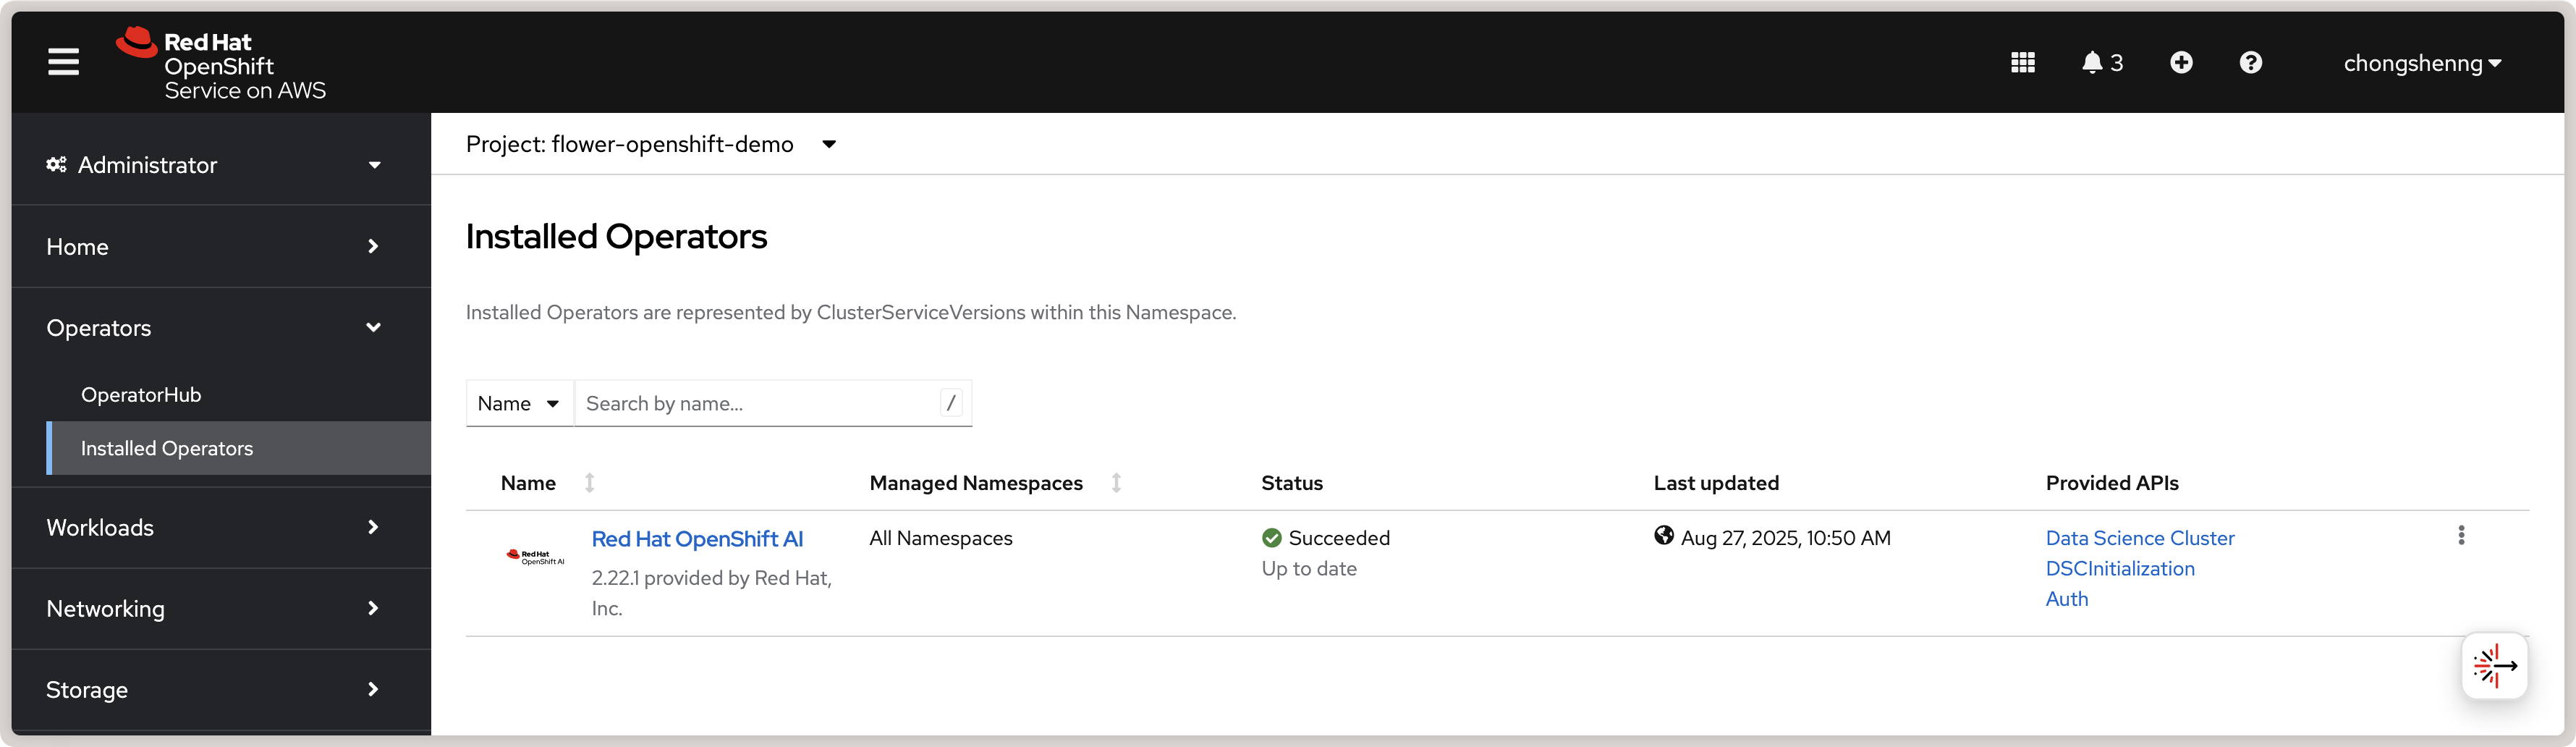
Opérateur d’intelligence artificielle collaborative Red Hat OpenShift dans OpenShift.
Installer un cluster de science des données
Après avoir installé l’Opérateur, nous devons installer DataScienceCluster via la console web. Suivez les étapes officielles in this link. Il est également recommandé de disable KServe dependencies puisque nous ne servons pas de modèles ML pour l’inference. Dans le panneau Installed Operators, cliquez sur Red Hat OpenShift AI, naviguez vers le panneau Data Science Cluster et cliquez sur Create DataScienceCluster. Sélectionnez la vue YAML de la configuration et collez la définition YAML suivante :
rhosai-datasciencecluster.yaml
apiVersion: datasciencecluster.opendatahub.io/v1
kind: DataScienceCluster
metadata:
  name: default-dsc
  labels:
    app.kubernetes.io/created-by: rhods-operator
    app.kubernetes.io/instance: default-dsc
    app.kubernetes.io/managed-by: kustomize
    app.kubernetes.io/name: datasciencecluster
    app.kubernetes.io/part-of: rhods-operator
spec:
  components:
    codeflare:
      managementState: Removed
    kserve:
      managementState: Removed
    modelregistry:
      managementState: Removed
    feastoperator:
      managementState: Removed
    trustyai:
      managementState: Removed
    ray:
      managementState: Removed
    kueue:
      managementState: Removed
    workbenches:
      workbenchNamespace: rhods-notebooks
      managementState: Managed
    dashboard:
      managementState: Managed
    modelmeshserving:
      managementState: Removed
    llamastackoperator:
      managementState: Removed
    datasciencepipelines:
      managementState: Removed
    trainingoperator:
      managementState: Removed
Cliquez sur Create pour créer le cluster de Data Science. Si réussi, vous devriez voir une instance default-dsc dans l’onglet Data Science Clusters avec un signe de vérification vert :
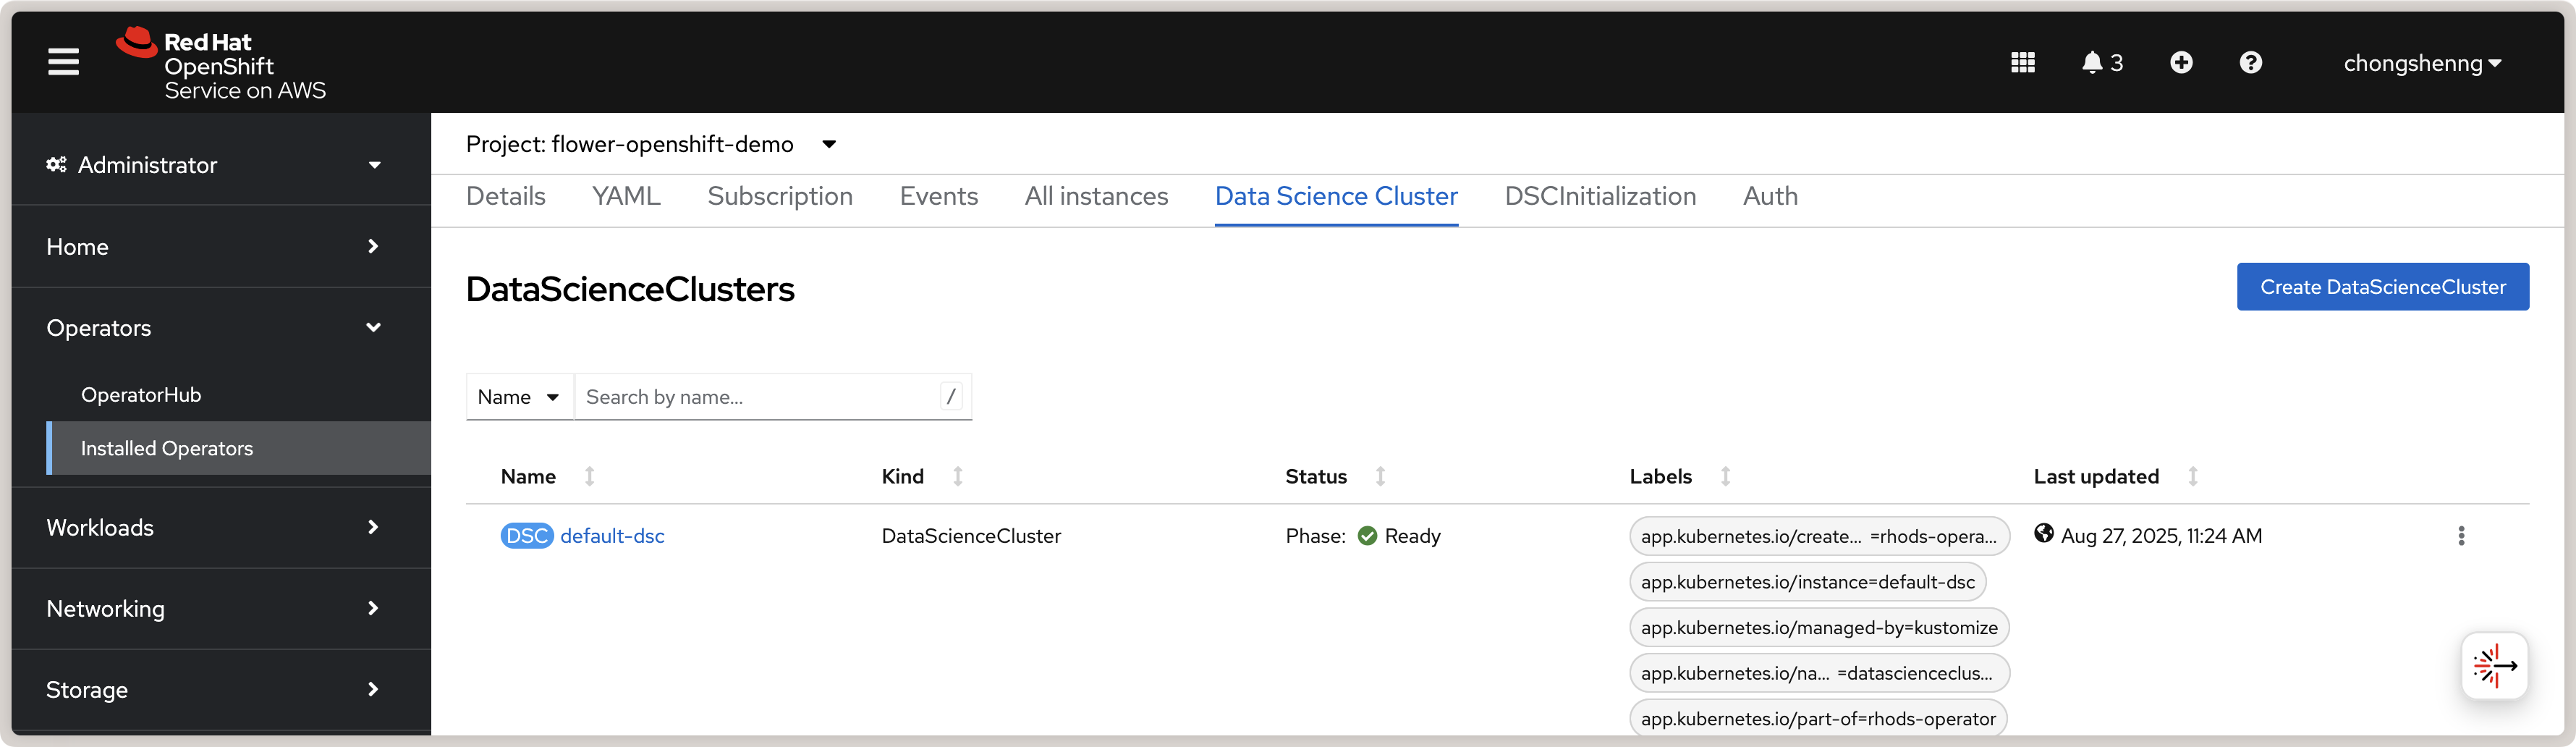
Vue d’un cluster de science des données Red Hat OpenShift AI créé avec succès.
Une fois que les choses ci-dessus sont terminées, vous serez en mesure de lancer l’intelligence artificielle OpenShift en cliquant sur l’icône du grilleau à droite supérieur de la console OpenShift et en cliquant sur le lien Red Hat OpenShift AI :

Lancer l’intelligence artificielle collaborative Red Hat OpenShift à partir de la console OpenShift.
Suivez les instructions lorsque vous êtes invité à Log in with OpenShift. Après avoir connecté, vous serez redirigé vers le tableau de bord d’intelligence artificielle OpenShift.
Créer une image d’OpenShift AI personnalisée avec Flower
Dans l’atelier AI OpenShift, vous allez construire et exécuter votre application Flower dans un environnement de bloc-notes Jupyter. Cependant, l’image d’atelier AI OpenShift par défaut ne contient pas Flower installé. Par conséquent, nous allons créer une image d’OpenShift AI personnalisée avec Flower pré-installée. Cette image personnalisée sera ensuite utilisée pour créer un atelier. Les étapes de cette section sont adaptées du guide officiel Red Hat OpenShift AI pour creating a custom workbench image.
Préalables : Étant donné que l’application Red Hat OpenShift AI doit être en mesure de tirer des registres de conteneurs, vous devrez créer un compte sur quay.io si vous n’en avez pas déjà un. Ensuite, créez un nouveau dépôt, par exemple flowerlabs/demo, et le rendez public. Vous aurez également besoin d’installer l’executable Docker CLI tool sur votre système. Ensuite, connectez-vous à votre compte quay.io en utilisant la commande :
docker login quay.io
Maintenant, nous sélectionnons une image de base pour notre image personnalisée d’intelligence artificielle OpenShift. Dans la console Red Hat OpenShift, allez dans Builds > ImageStreams. Vous pouvez trouver les images de travail par défaut pour le projet redhat-ods-applications. Sélectionnez l’image s2i-minimal-notebook et choisissez l’étiquette d’image que vous souhaitez utiliser et copiez l’identifiant sha256. Dans ce guide, nous utilisons la balise 2025.1.
Créez ensuite dans votre machine un fichier Dockerfile avec le contenu suivant :
Dockerfile
FROM quay.io/modh/odh-workbench-jupyter-minimal-cpu-py311-ubi9@sha256:0ea737f6c626d5d01b44fc8c6537a193ad45c378aed9ff98b209968dff418075

USER 1001

RUN pip install flwr==1.33.0
Construirez et envoyez l’image de conteneur vers votre dépôt public sur quay.io:
docker build -t quay.io/flowerlabs/demo/flwr-rhos:0.0.1 . && docker push quay.io/flowerlabs/demo/flwr-rhos:0.0.1
Une fois l’image poussée, nous configurerons OpenShift AI pour charger cette image de travail personnalisée. Dans l’interface de dashboard d’OpenShift AI, allez à Settings > Workbench images et cliquez sur Import new image. Définissez Image location sur votre image personnalisée (par exemple, quay.io/flowerlabs/demo/flwr-rhos:0.0.1@sha256[...]) et donnez-lui un nom (par exemple, flwr-rhos-image). Notez le nom de la ressource car vous en aurez besoin dans la section suivante pour créer votre travail. Cliquez ensuite sur Import pour importer l’image. Si c’est réussi, vous devriez voir votre image personnalisée dans la liste des images de travail :
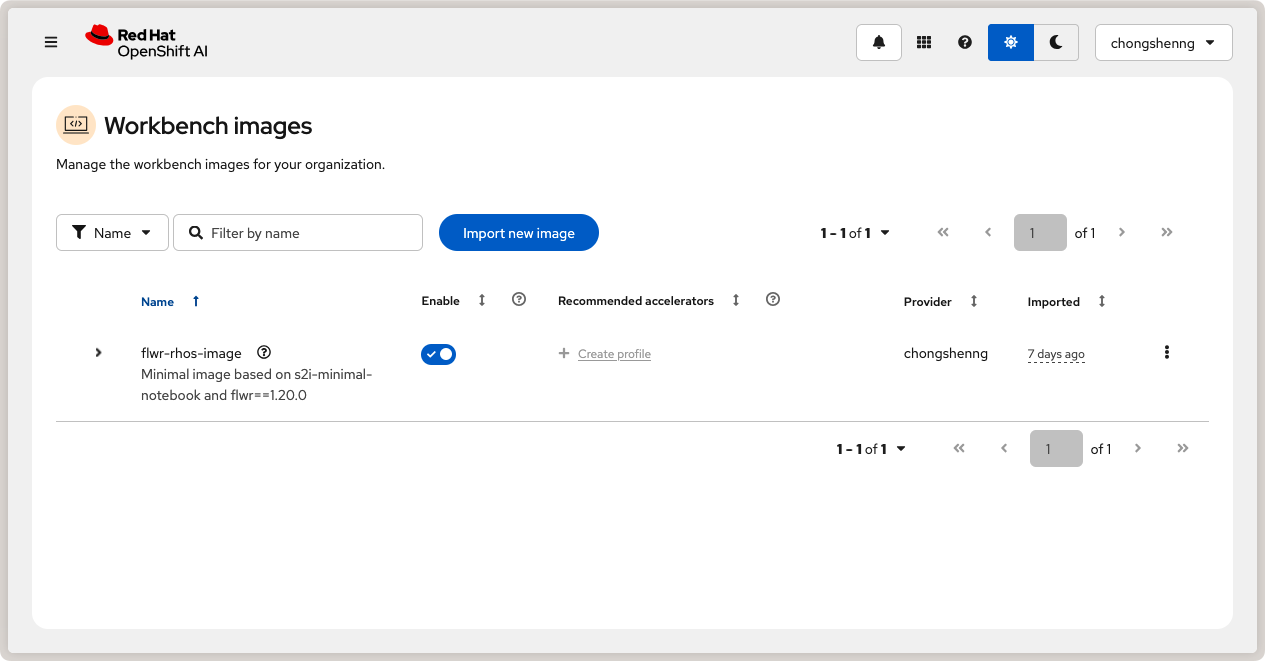
Image de travail OpenShift AI personnalisée avec Flower.
Créer un projet de science des données
Nous sommes maintenant prêts à créer un projet de science des données dans OpenShift AI et à créer une interface de travail en utilisant l’image personnalisée que nous avons créée précédemment dans la section précédente.
Dans le côté gauche du menu, cliquez sur Home, naviguez dans la section Data Science Projects et cliquez sur le bouton Create project. Donnez un nom à votre projet, par exemple flower-openshift-demo, et - si vous le souhaitez, une description. Ensuite, cliquez sur Create. Cliquez sur votre projet créé pour l’ouvrir.
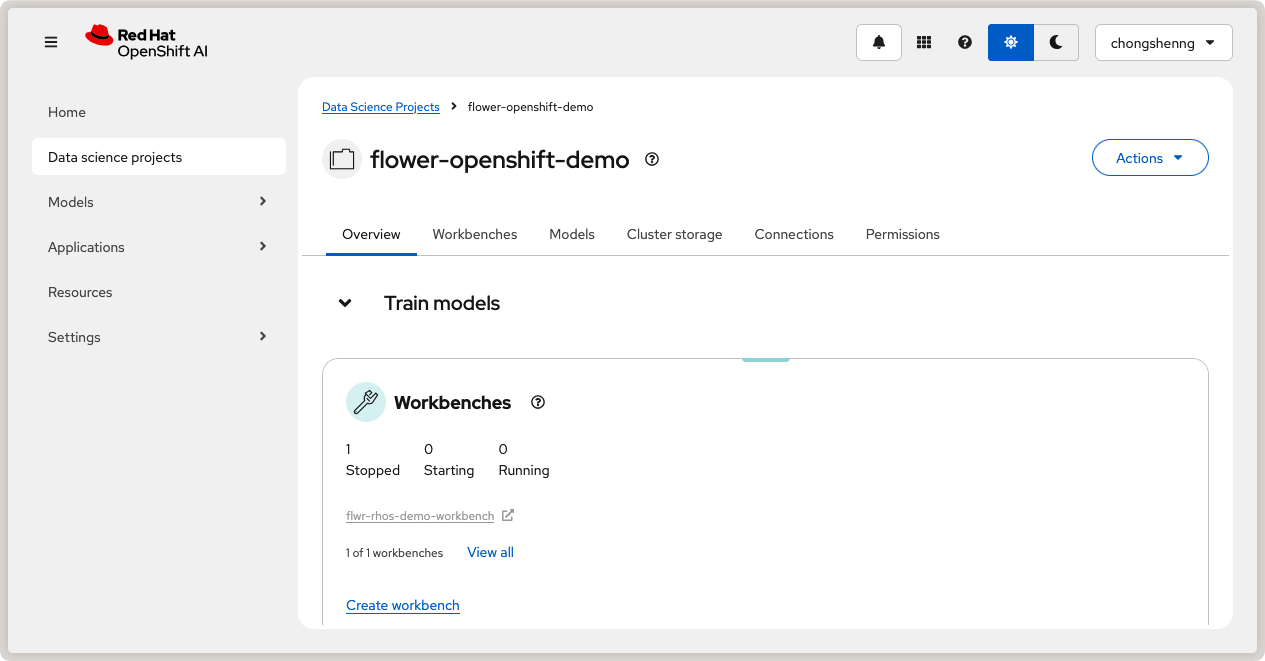
Projet de science des données dans Red Hat OpenShift AI.
Naviguez vers le Workbenches et cliquez sur Create workbench pour créer une nouvelle interface de travail. Dans « Nom et description », fournissez un nom à votre interface de travail, par exemple flwr-rhos-demo-workbench. Sous Workbench image > Image selection, sélectionnez le nom de l’image que vous avez fourni précédemment (c’est-à-dire flwr-rhos-image). Choisissez une taille de conteneur moyenne et laissez les autres paramètres par défaut. Cliquez ensuite sur Create Workbench. L’état de votre interface de travail devrait passer à Running après quelques minutes :
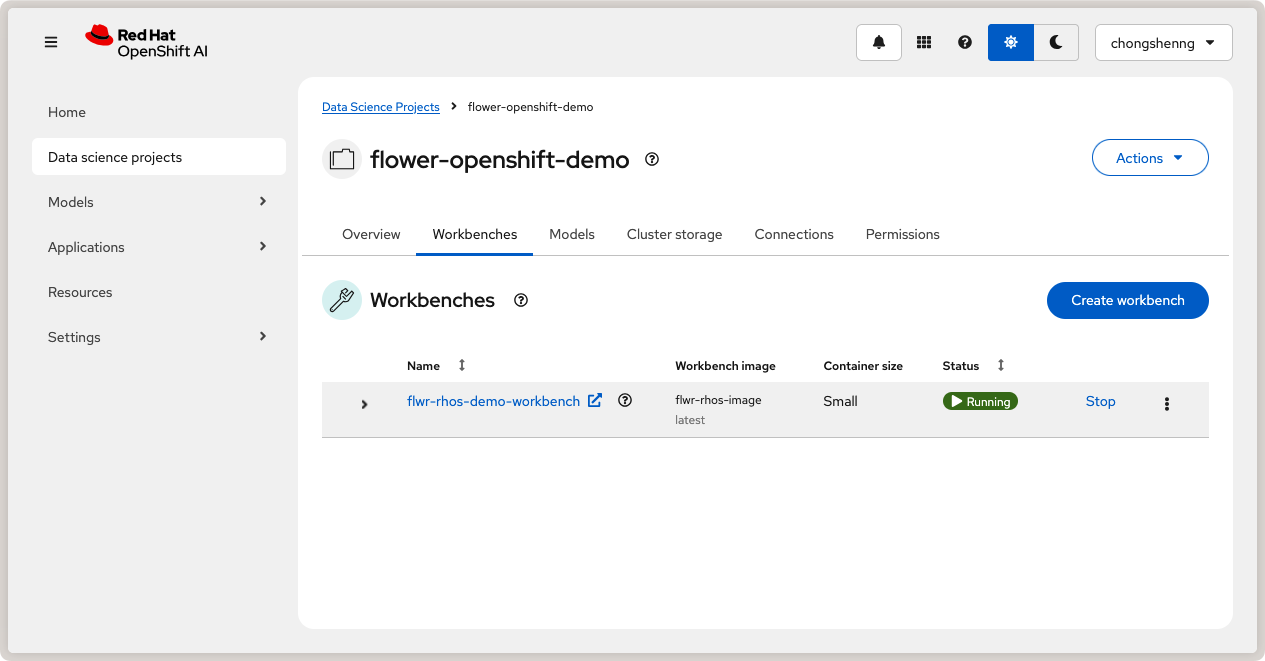
Interface de travail en cours d’exécution dans Red Hat OpenShift AI.
Cliquez maintenant sur votre interface de travail et lancez l’environnement JupyterLab.
Exécuter l’application Flower dans OpenShift AI
Avec une interface de travail en cours d’exécution et des pods SuperLink et SuperNode déployés dans votre cluster OpenShift, vous êtes maintenant prêt à exécuter une application Flower ! Dans l’environnement JupyterLab de votre interface de travail, vérifiez que Flower est installé correctement et fonctionne comme attendu : ouvrez un nouveau terminal et exécutez flwr --version pour vérifier la version de Flower :
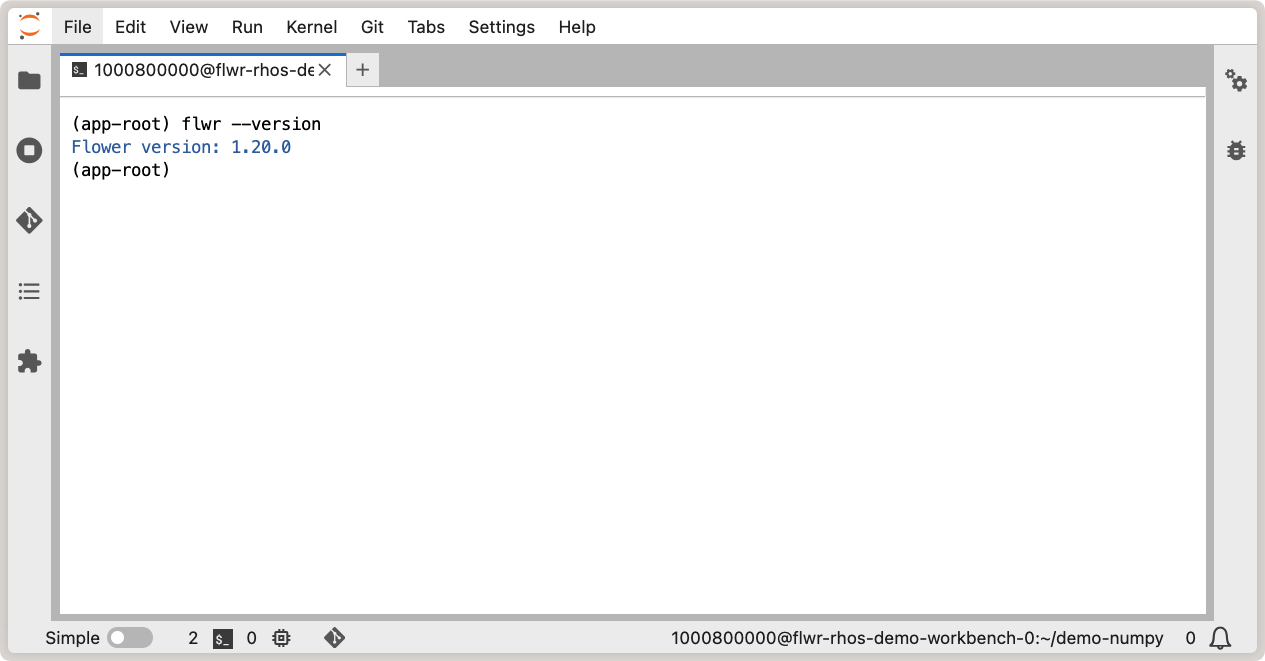
Vérification de l’installation de Flower dans l’interface de travail OpenShift AI.
Avec Flower fonctionnant correctement, vous pouvez maintenant suivre les étapes habituelles d’utilisation de flwr new pour créer un nouveau Flower app à partir d’un modèle et flwr run pour exécuter votre application Flower sur les pods déployés SuperLink et SuperNode. Étant donné que nous avons déployé l’instance AI OpenShift dans le même espace de noms (flower-openshift-demo) que le SuperLink dans le cluster OpenShift, la seule modification que vous devez effectuer est de définir une nouvelle connexion SuperLink dans le fichier de configuration Flower:
Exécutez
flwr config listpour localiser le fichier de configuration Flower sur votre machine et afficher les connexions SuperLink disponibles.$ flwr config list Flower Config file: /path/to/.flwr/config.toml SuperLink connections: supergrid local (default)
Ouvrez le fichier de configuration Flower (
config.toml) et ajoutez une nouvelle connexion SuperLink à la fin:config.toml¶[superlink.remote] address = "superlink-service:9093" # use the service name created earlier insecure = true
Et enfin, exécutez votre application Flower comme d’habitude avec flwr run:
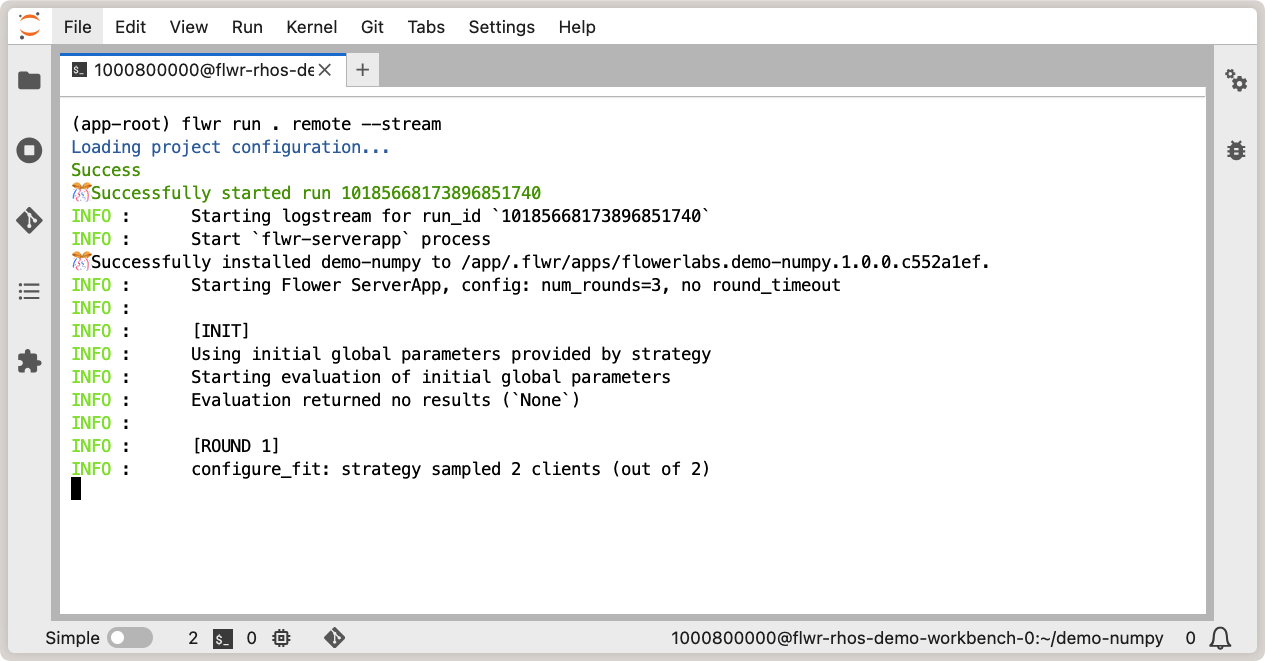
Exécuter l’application Flower dans l’interface de travail OpenShift AI.
Vous pouvez également afficher les journaux du pod SuperLink dans la console OpenShift. Naviguez vers Workloads > Pods, cliquez sur le pod SuperLink, puis cliquez sur l’icône Logs:
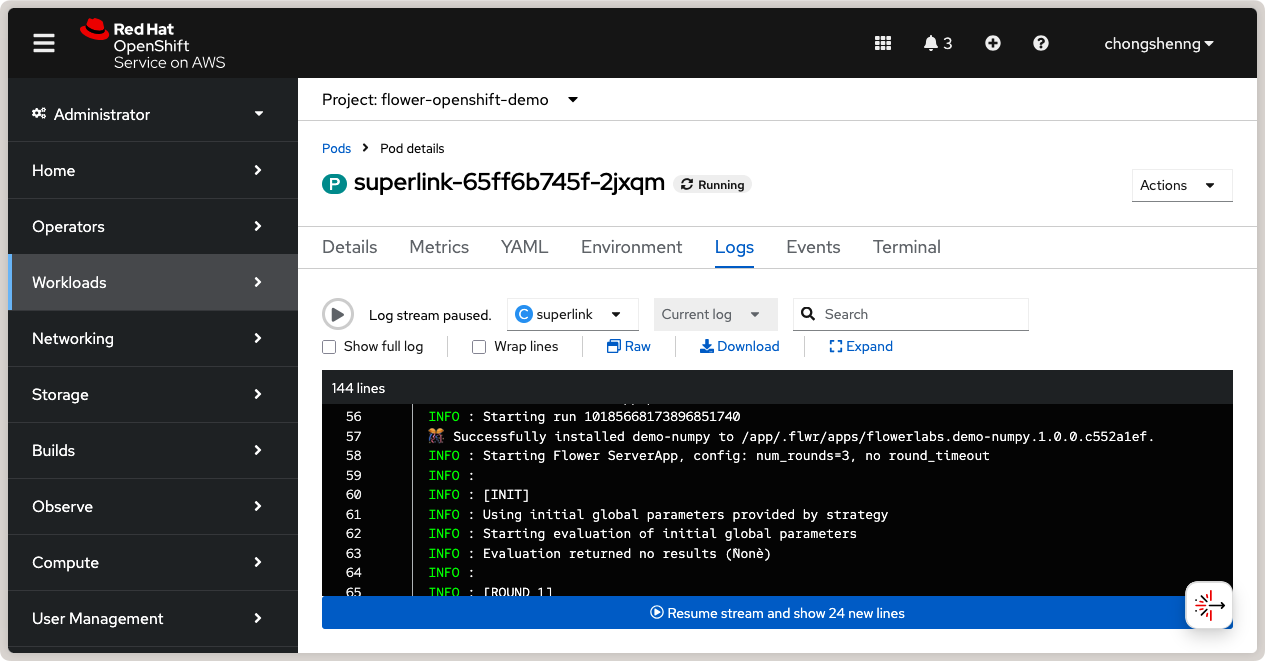
Journal des logs SuperLink montrant les SuperNodes connectés et l’application Flower en cours d’exécution.
Félicitations ! Vous avez réussi à créer, déployer et exécuter une application Flower sur Red Hat OpenShift en utilisant le Service de Red Hat OpenShift sur AWS. Vous pouvez explorer l’exécution de différentes applications Flower et des charges de travail fédérées dans votre cluster OpenShift, par exemple with PyTorch. Pour plus d’informations sur la mise en œuvre de Flower avec Docker et Kubernetes, consultez nos guides ci-dessous :
Pour en savoir plus sur l’exécution de Flower sur d’autres plateformes cloud, consultez nos guides ci-dessous :